


Fallout 4 Bobblehead Locations: Where to Find Every Bobblehead
Fallout 4 Bobblehead Locations Guide | SteelSeries
Find all 20 Fallout 4 bobblehead locations with exact placement, combat warnings, and instructions, including every quest-gated and easy-to-miss pickup.
There are 20 Vault-Tec bobbleheads hidden across the Commonwealth in Fallout 4, and every single one is worth tracking down. Each bobblehead delivers a permanent stat boost, either a +1 increase to one of your seven SPECIAL attributes or a permanent skill bonus like increased critical damage, easier lockpicking, or more effective Stimpaks. Pick one up after a SPECIAL stat hits 10, and it pushes you to 11 (the only way to break the cap).
The problem is that most of them aren't exactly sitting in plain sight. They're buried in enemy-packed factories, locked behind quest progression, and tucked into corners that are easy to walk right past. This guide covers all 20 bobblehead locations in Fallout 4 with step-by-step directions, exact room placement, and combat warnings so you know what you're walking into before you get there.
Quick Reference: All 20 Fallout 4 Bobblehead Locations
Bobblehead | Type | Location | Effect | Notes |
Strength | SPECIAL | Mass Fusion Building | Strength +1 | Lobby level; accessible early game |
Perception | SPECIAL | Museum of Freedom, Concord | Perception +1 | Found during "When Freedom Calls" |
Endurance | SPECIAL | Poseidon Energy | Endurance +1 | Boss enemy (Cutty) patrols nearby |
Charisma | SPECIAL | Parsons State Insane Asylum | Charisma +1 | ⚠️ Quest-gated: requires "The Secret of Cabot House" |
Intelligence | SPECIAL | Boston Public Library | Intelligence +1 | Pass speech check at intercom for easier access |
Agility | SPECIAL | Wreck of the FMS Northern Star | Agility +1 | On bow platform; watch your step |
Luck | SPECIAL | Spectacle Island (green boat, south shore) | Luck +1 | Mirelurk Queen patrols nearby |
Barter | Skill | Longneck Lukowski's Cannery | Prices 5% better | Metal hut on upper catwalk |
Big Guns | Skill | Vault 95 | +25% crit damage, heavy weapons | Gunner-heavy; also where you recruit Cait |
Energy Weapons | Skill | Fort Hagen | +25% crit damage, energy weapons | ⚠️ Quest-gated: requires "Reunions" |
Explosives | Skill | Saugus Ironworks | +15% explosive damage | Behind boss Slag; upper catwalk control panel |
Lock Picking | Skill | Pickman Gallery (basement) | Lockpicking permanently easier | Next to flaming trash can |
Medicine | Skill | Vault 81 (secret section) | Stimpaks heal 10% more | ⚠️ Avoid Mole Rat bites — permanent HP loss |
Melee | Skill | Trinity Tower (top floor) | +25% crit damage, melee | Inside Rex and Strong's cage |
Repair | Skill | Corvega Assembly Plant (rooftop) | Fusion cores last 10% longer | Far end of exterior south walkway |
Science | Skill | Malden Middle School / Vault 75 | +1 extra terminal hack guess | ⚠️ Requires Lab Access Card from Gunner Commander |
Small Guns | Skill | Gunners Plaza | +25% crit damage, ballistic guns | Master-locked studio door; key on Ryder one floor down |
Sneak | Skill | Dunwich Borers | 10% harder to detect | Area 4 marker; Ghoul-heavy location |
Speech | Skill | Park Street Station / Vault 114 | Vendors carry 100 more caps | ⚠️ Quest-gated: requires "Unlikely Valentine" |
Unarmed | Skill | Atom Cats Garage (car hood) | +25% crit damage, unarmed | No combat required |
SPECIAL Bobbleheads
There are seven SPECIAL bobbleheads in Fallout 4, each permanently increasing one core attribute by +1. If you collect one after that stat is already at 10, it pushes you to 11, the only way to break the SPECIAL cap without cheats.
Strength: Mass Fusion Building
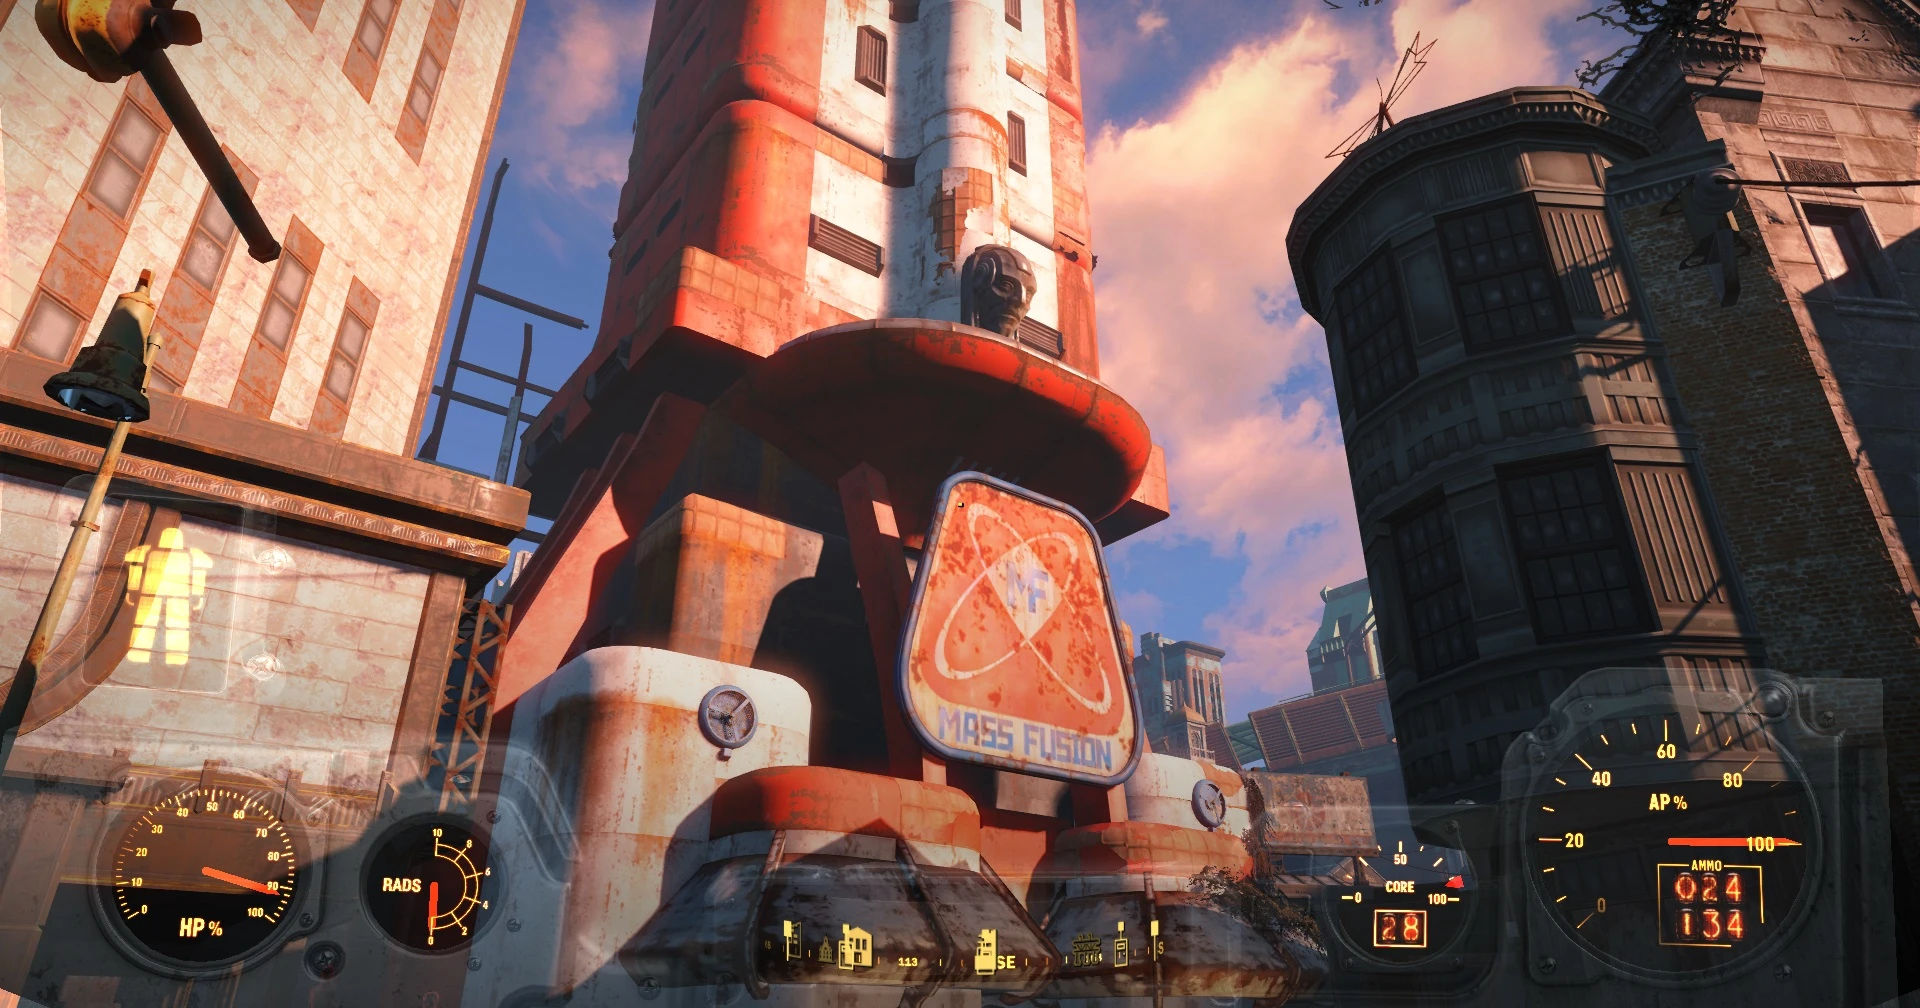
Effect: Strength +1
How to get there: The Mass Fusion Building is a tall glass tower in downtown Boston, just northwest of Diamond City. Enter through the main lobby doors on the ground floor.
Exact location: Once inside the lobby, look up. There's a large Art Deco metal statue mounted on the wall above the reception desk. The Strength bobblehead is sitting on top of it. You'll need to jump up onto the desk and then onto the statue to grab it.
Combat/access warning: Mass Fusion is tied to a late-game Brotherhood of Steel quest, and the upper floors become heavily restricted during that mission. However, the lobby level (where the bobblehead is) is accessible from the very start of the game, with minimal resistance on your way in.
Perception: Museum of Freedom
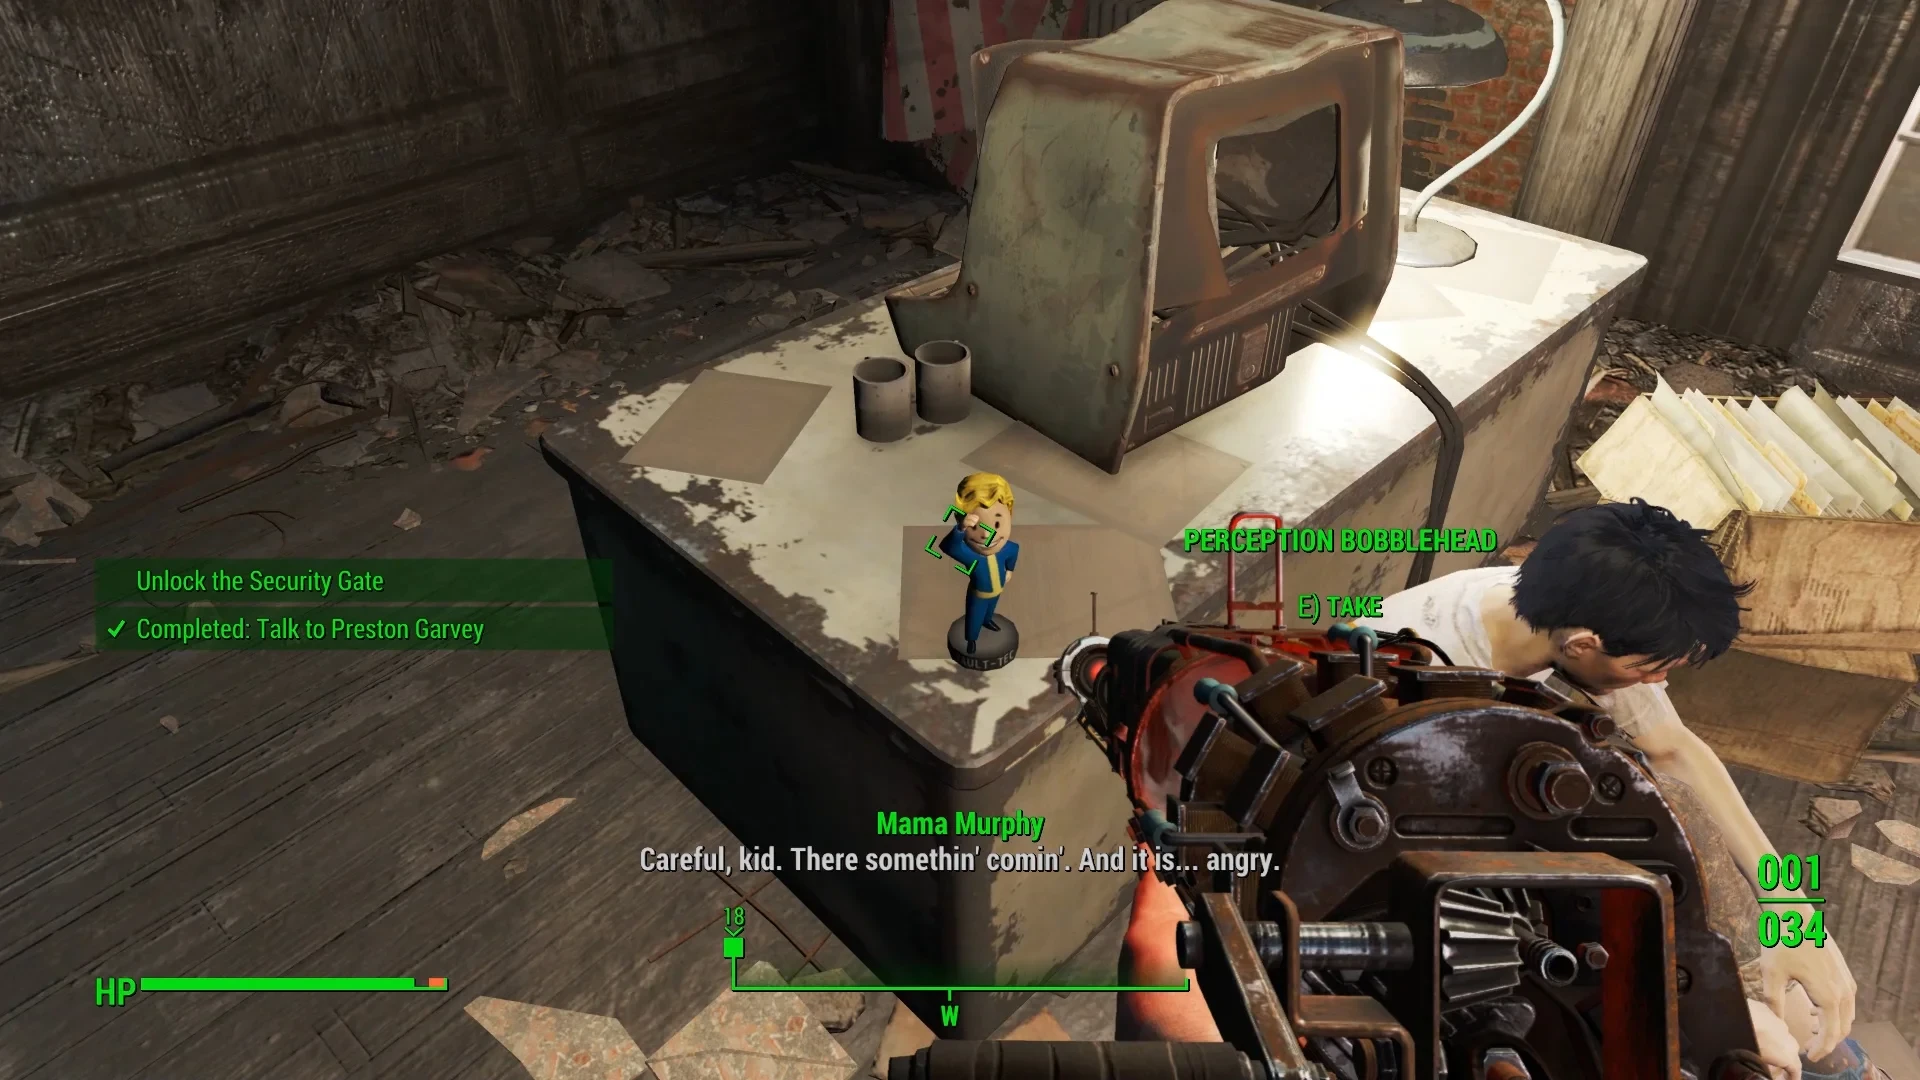
Effect: Perception +1
How to get there: The Museum of Freedom is in Concord, a short trip southeast of Sanctuary Hills. It's one of the first locations you'll visit during the main quest "When Freedom Calls."
Exact location: Fight your way up to the top floor where Preston Garvey and the surviving settlers are barricaded. The bobblehead is on the desk next to the broken terminal in that same room, directly to the left as you enter.
Combat/access warning: The museum is full of raiders on your first visit. Clear them out on the way up. If you've already completed "When Freedom Calls," the building will be much quieter on a return trip.
Endurance: Poseidon Energy
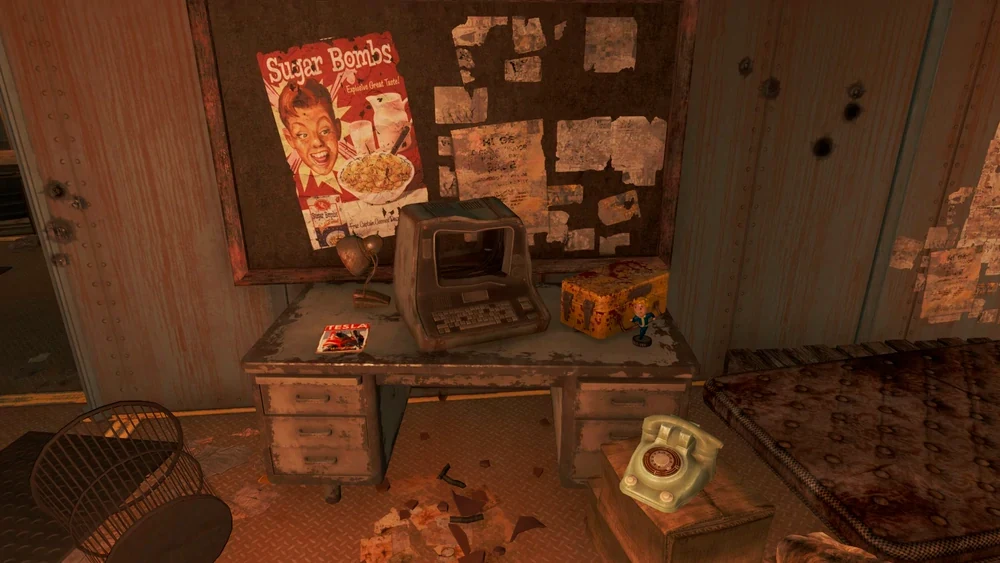
Effect: Endurance +1
How to get there: Poseidon Energy is a large power plant in the southeastern corner of the map, near the main road along the coast. Enter via the drainpipes on the southeast side of the building for the most direct route in.
Exact location: Navigate the central metal catwalks to the upper-level office. The bobblehead is on the desk inside, next to a terminal and a steamer trunk.
Combat/access warning: Poseidon Energy is heavily guarded by raiders, including a boss-level enemy named Cutty who patrols the catwalk area in Power Armor. Come prepared for a tough fight; bring armor-piercing ammo or explosives to deal with him efficiently.
Charisma: Parsons State Insane Asylum
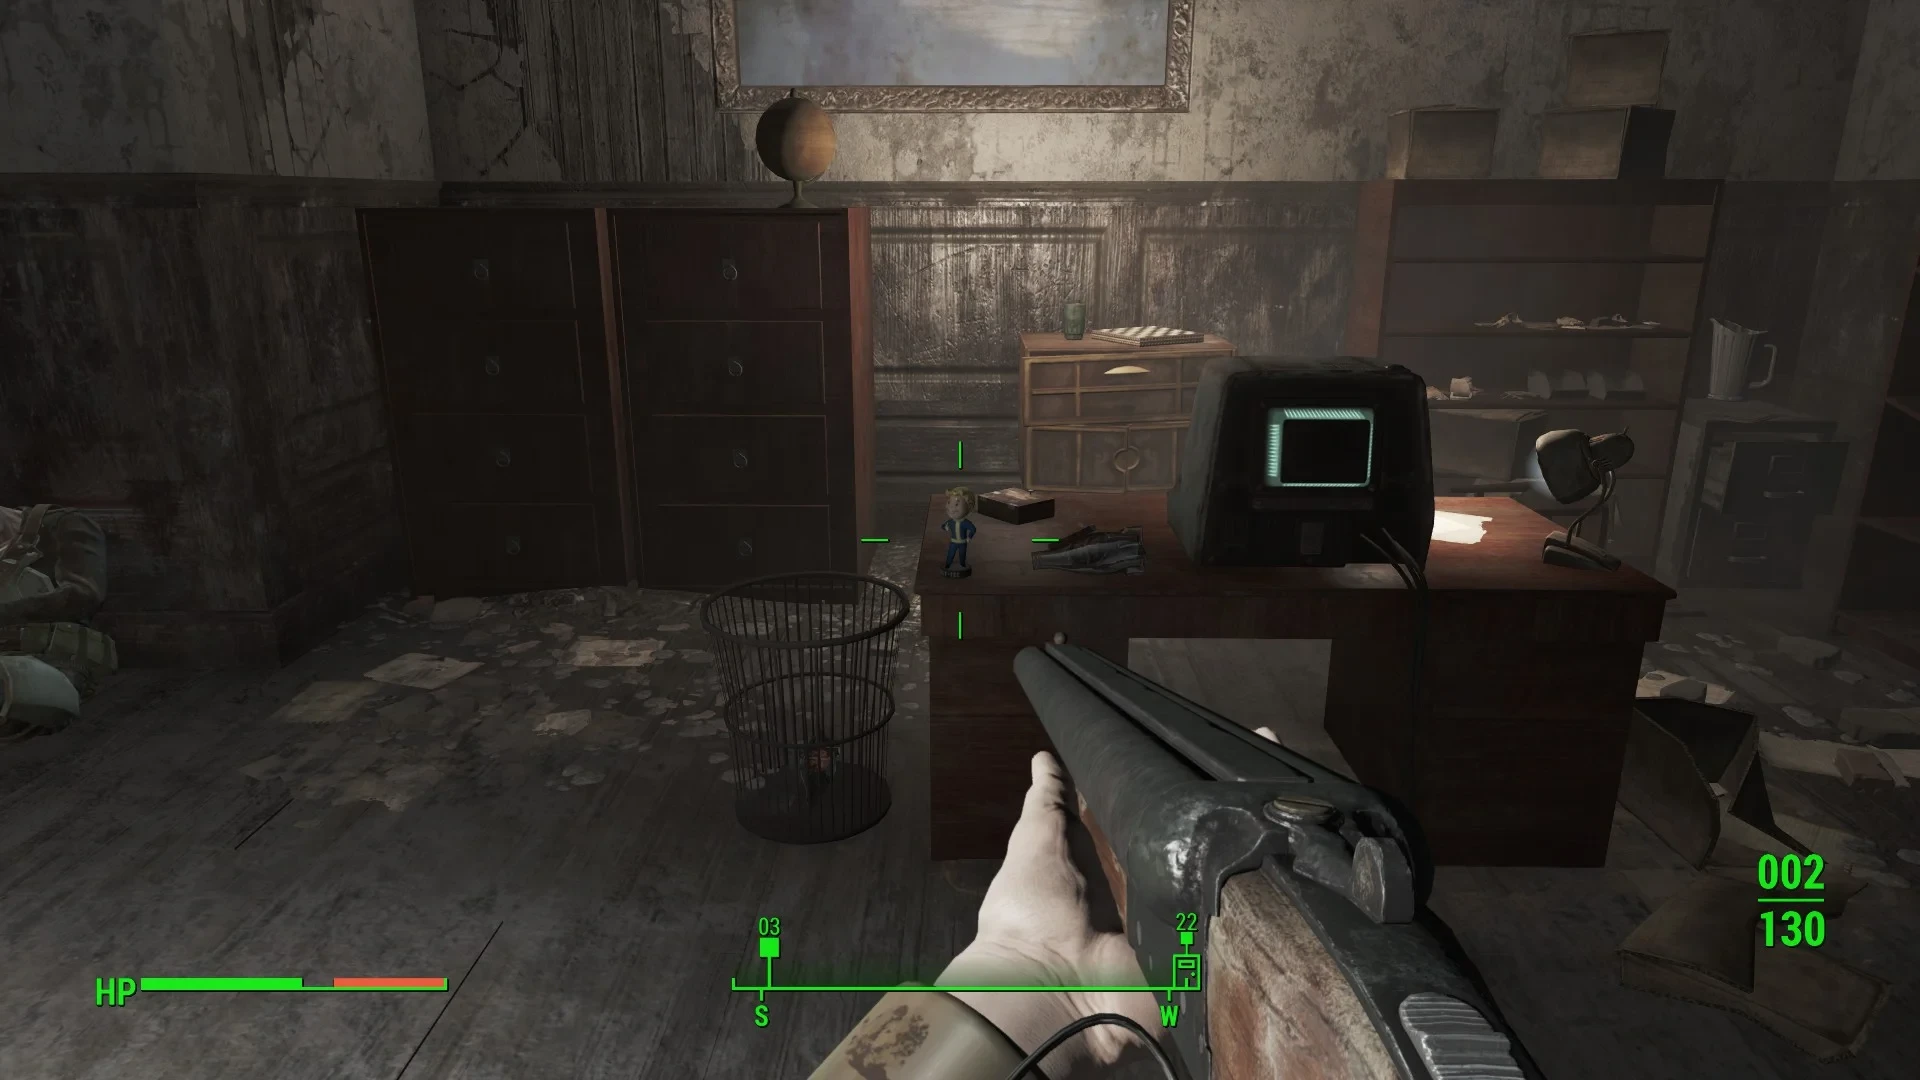
Effect: Charisma +1
How to get there: Parsons State Insane Asylum is in the northeast of the map, just west of Salem. This bobblehead is locked behind quest progression: you cannot enter the asylum without being on "The Secret of Cabot House." To trigger it, find Edward Deegan (a ghoul mercenary who spawns at Bunker Hill's market, the Dugout Inn or Colonial Taphouse in Diamond City, or the Third Rail in Goodneighbor), accept his "Special Delivery" quest, complete it, then complete "Emogene Takes a Lover." Jack Cabot will then ask you to meet him at the asylum.
Exact location: Follow Jack Cabot through the building to the Administration area. The bobblehead is on the desk in Jack Cabot's office.
Combat/access warning: The asylum is full of hostile inmates and asylum staff. Stay close to Jack Cabot as he leads you through, engaging in unnecessary fights here can complicate the quest. Also note: a known bug in "Emogene Takes a Lover" on console can prevent this quest from completing, locking you out of this bobblehead permanently without a fresh save.
Intelligence: Boston Public Library
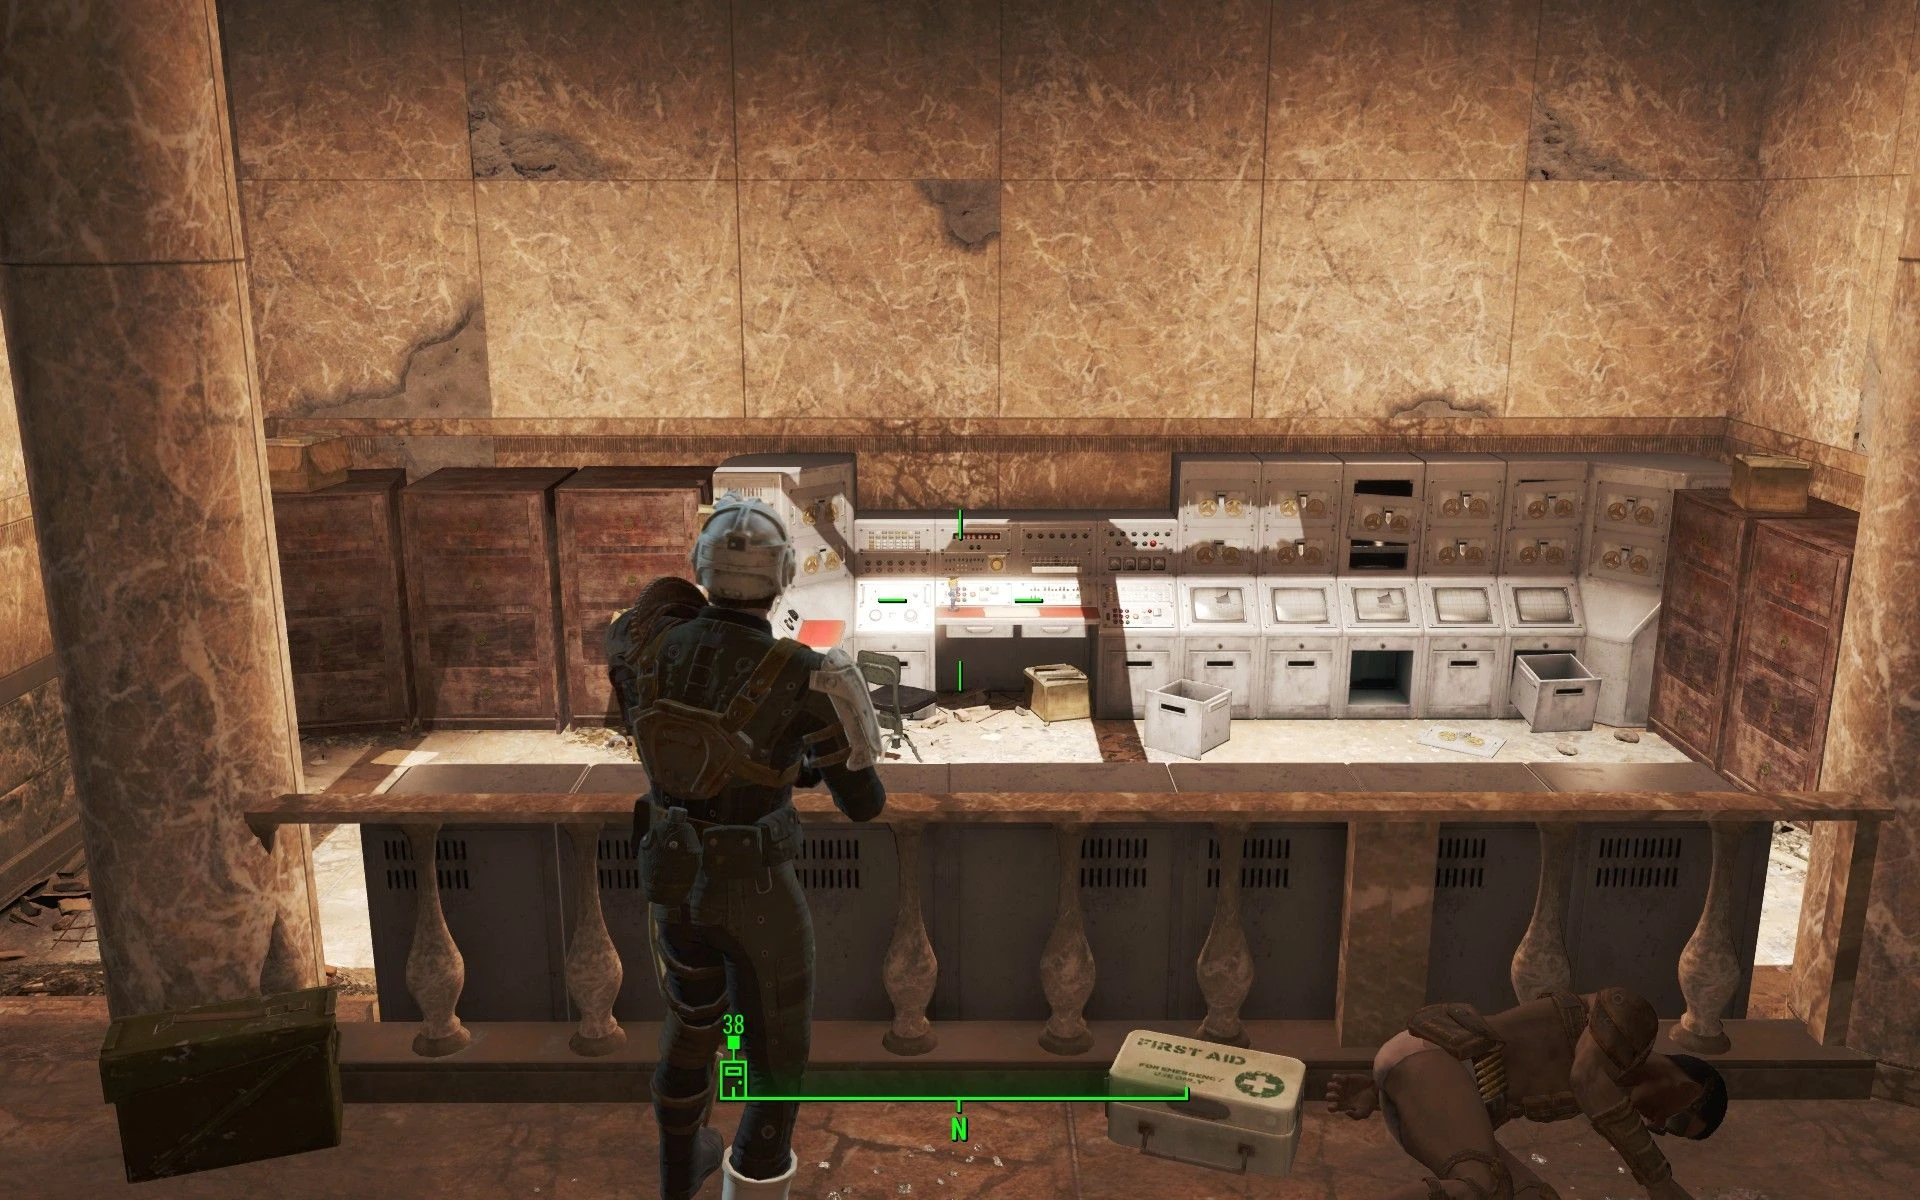
Effect: Intelligence +1
How to get there: The Boston Public Library is northeast of Diamond City. The main entrance requires an Advanced-locked door on the west side of the building, use the intercom beside it and pass an easy speech check to get inside without it counting as trespassing. Doing so also registers you as an employee, turning the Protectrons and turrets friendly (unless you attack first).
Exact location: Make your way to the Mechanical Room in the northwestern corner of the library. The bobblehead is sitting on top of the large computer bank terminal inside.
Combat/access warning: Despite the Protectrons being potentially friendly, the library has Super Mutants fighting them throughout the building. Expect active combat as you navigate. If you don't pass the speech check at the intercom, the automated defenses will also be hostile.
Agility: Wreck of the FMS Northern Star
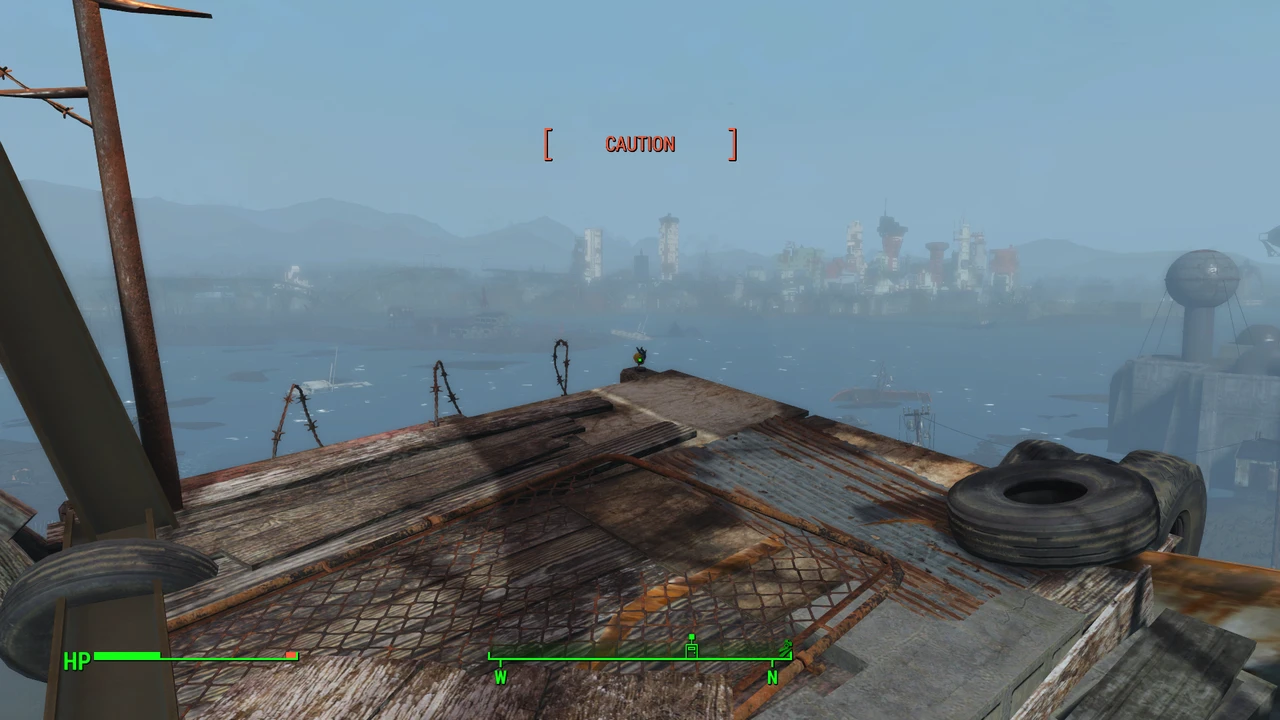
Effect: Agility +1
How to get there: The Wreck of the FMS Northern Star is a beached cargo ship on a small peninsula in the far southeastern corner of the map.
Exact location: Board the ship and make your way to the bow (the front). The bobblehead is on a small wooden platform jutting out over the edge of the bow (it looks like it's about to fall into the water).
Combat/access warning: The ship is crawling with Raiders and surrounded by Mirelurks on the shore. Fight through the Raiders on deck to reach the bow. Watch your step near the edge, the platform the bobblehead sits on has no railing.
Luck: Spectacle Island
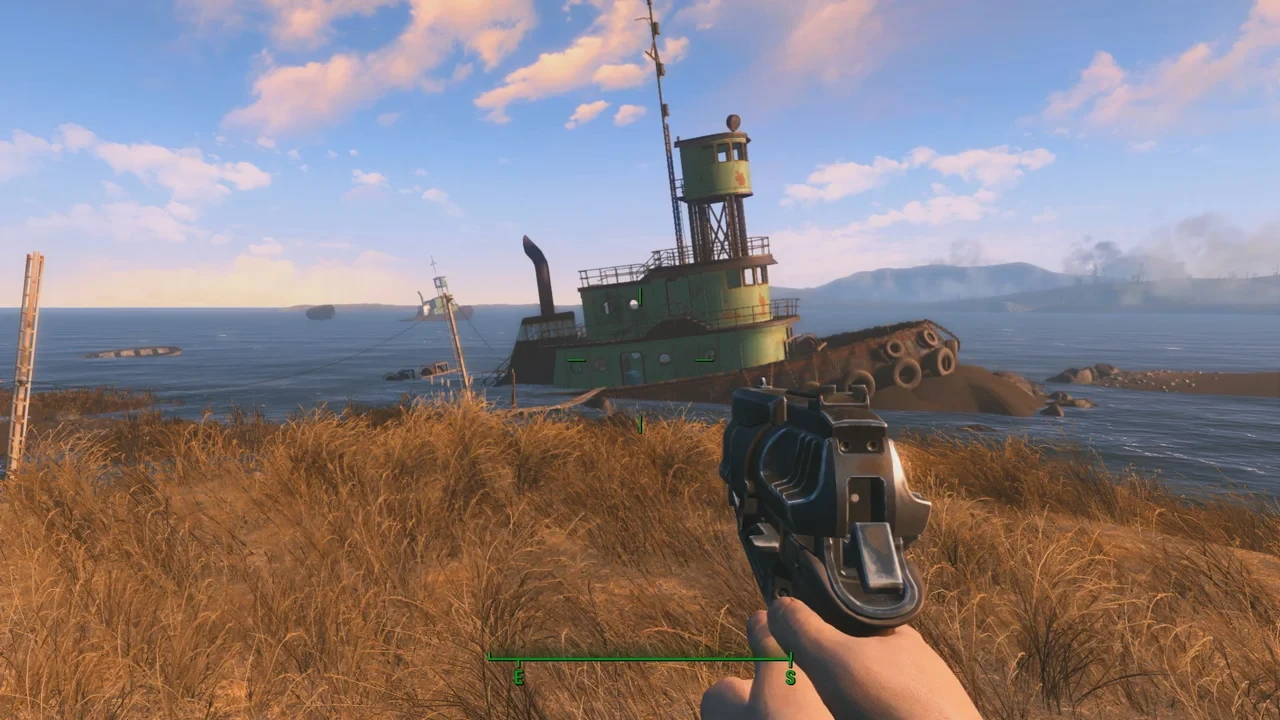
Effect: Luck +1
How to get there: Spectacle Island is in the southeastern bay of the map, a large island you'll need to swim or boat to. Fast travel here if you've previously discovered it.
Exact location: Head to the southern shore of the island. Look for a green boat moored along the coast. The bobblehead is inside a locker on the boat, next to a steamer trunk.
Combat/access warning: Spectacle Island is one of the more dangerous open-world locations in the game. It's home to a large number of Mirelurks, including Mirelurk Kings and a Mirelurk Queen. Clear the shore before searching the boat, or you'll be fighting with very little room to maneuver.
Skill Bobbleheads
The 13 skill bobbleheads don't raise SPECIAL stats. Instead, they grant permanent passive bonuses like bonus critical damage, cheaper prices, better hacking, and more. Here's where to find all of them.
Barter: Longneck Lukowski's Cannery
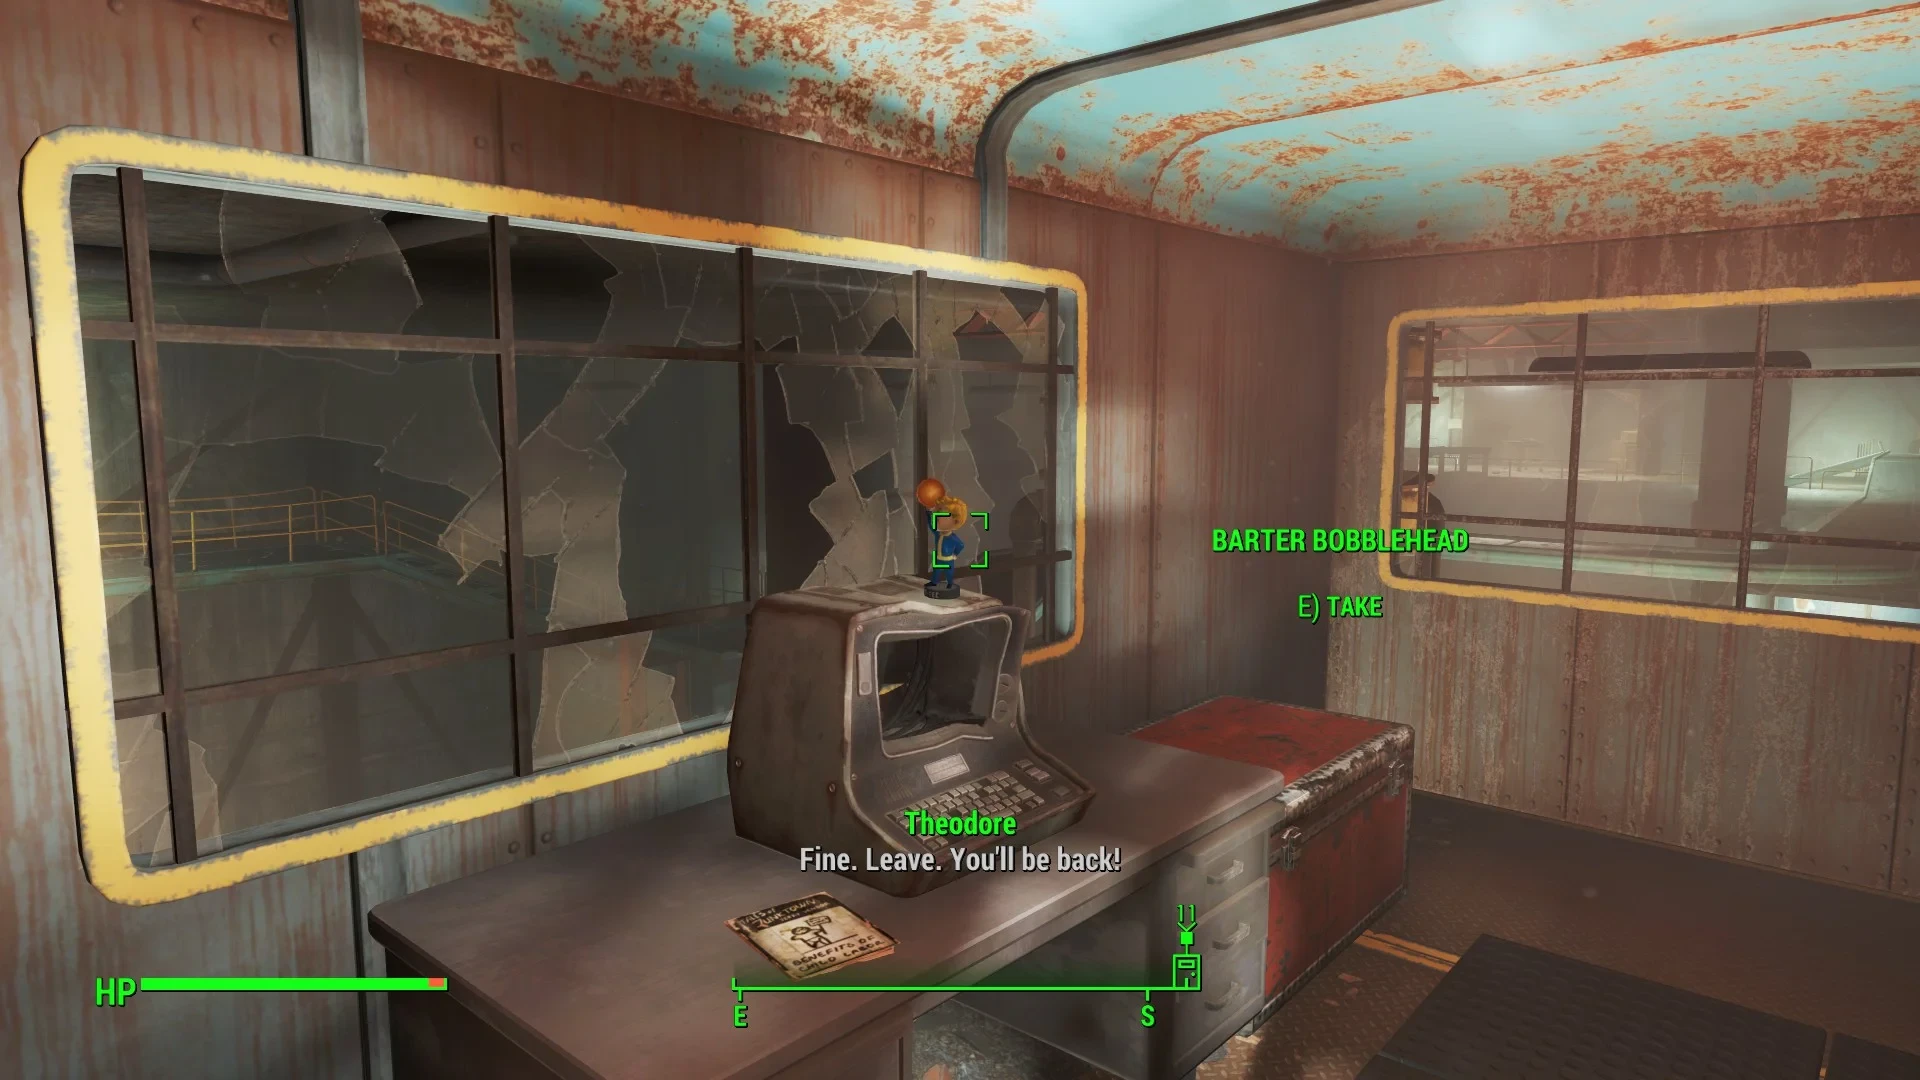
Effect: Prices are permanently 5% better
How to get there: Longneck Lukowski's Cannery is in the northeastern part of the map, you'll spot it easily by its three red and white chimneys. It's occupied by robots and a con artist named Theodore Collins.
Exact location: Head into the main cannery floor where the robots are processing meat. Take the stairs up to the upper level and find the metal hut on the catwalk in the northwestern section. The bobblehead is inside on top of a broken terminal.
Combat/access warning: The robots here aren't immediately hostile, but the situation can turn during the Theodore Collins dialogue depending on your choices. The room with the bobblehead is locked behind a Master-level door until that dialogue concludes. Let it play out before trying to get in.
Big Guns: Vault 95
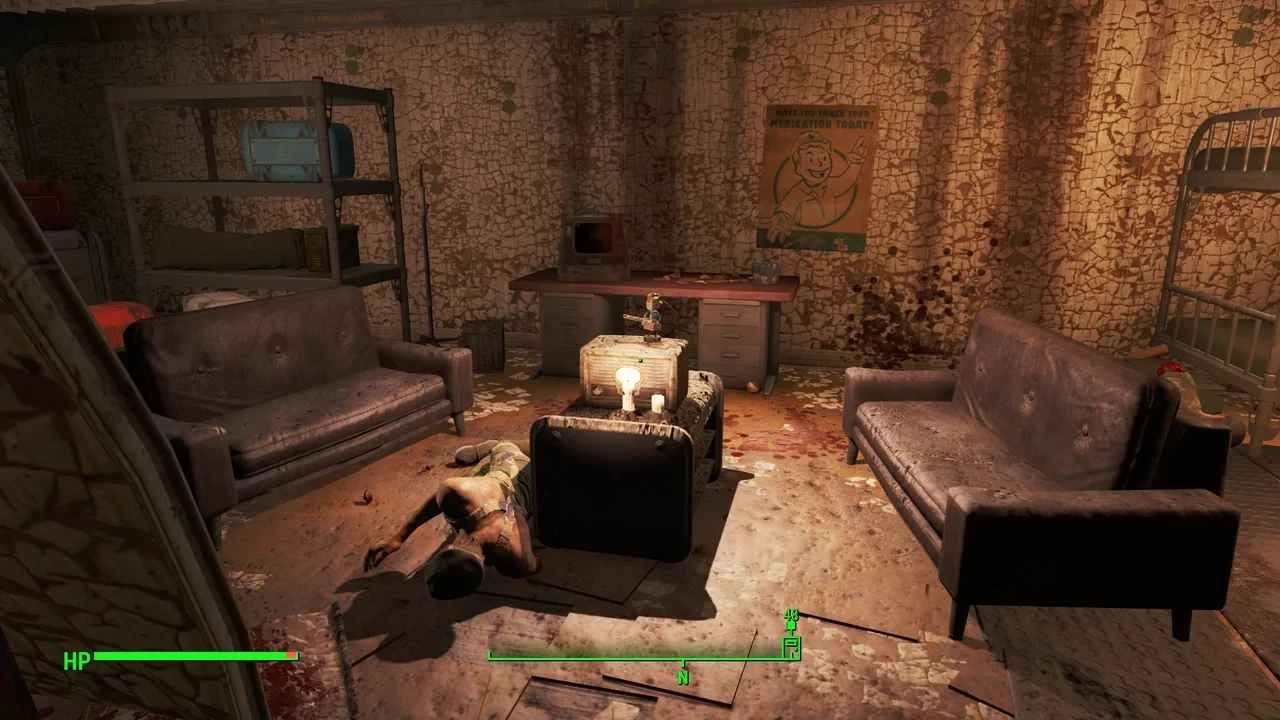
Effect: Permanently gain +25% critical damage with heavy weapons
How to get there: Vault 95 is in the southwestern area of the map, southeast of Sanctuary. It's a Gunner-occupied vault, so expect heavy resistance throughout.
Exact location: Make your way to the Residential area. Head to the northernmost room, go through the destroyed wall at the bottom of the ramp, then through the door on your right. The bobblehead is sitting on top of the radio in that room.
Combat/access warning: Vault 95 is packed with Gunners at every level. It's also where the companion Cait can be recruited if you haven't already. It’s worth combining both objectives into a single run. Come loaded with heavy firepower as this is a mid-to-late game location.
Energy Weapons: Fort Hagen
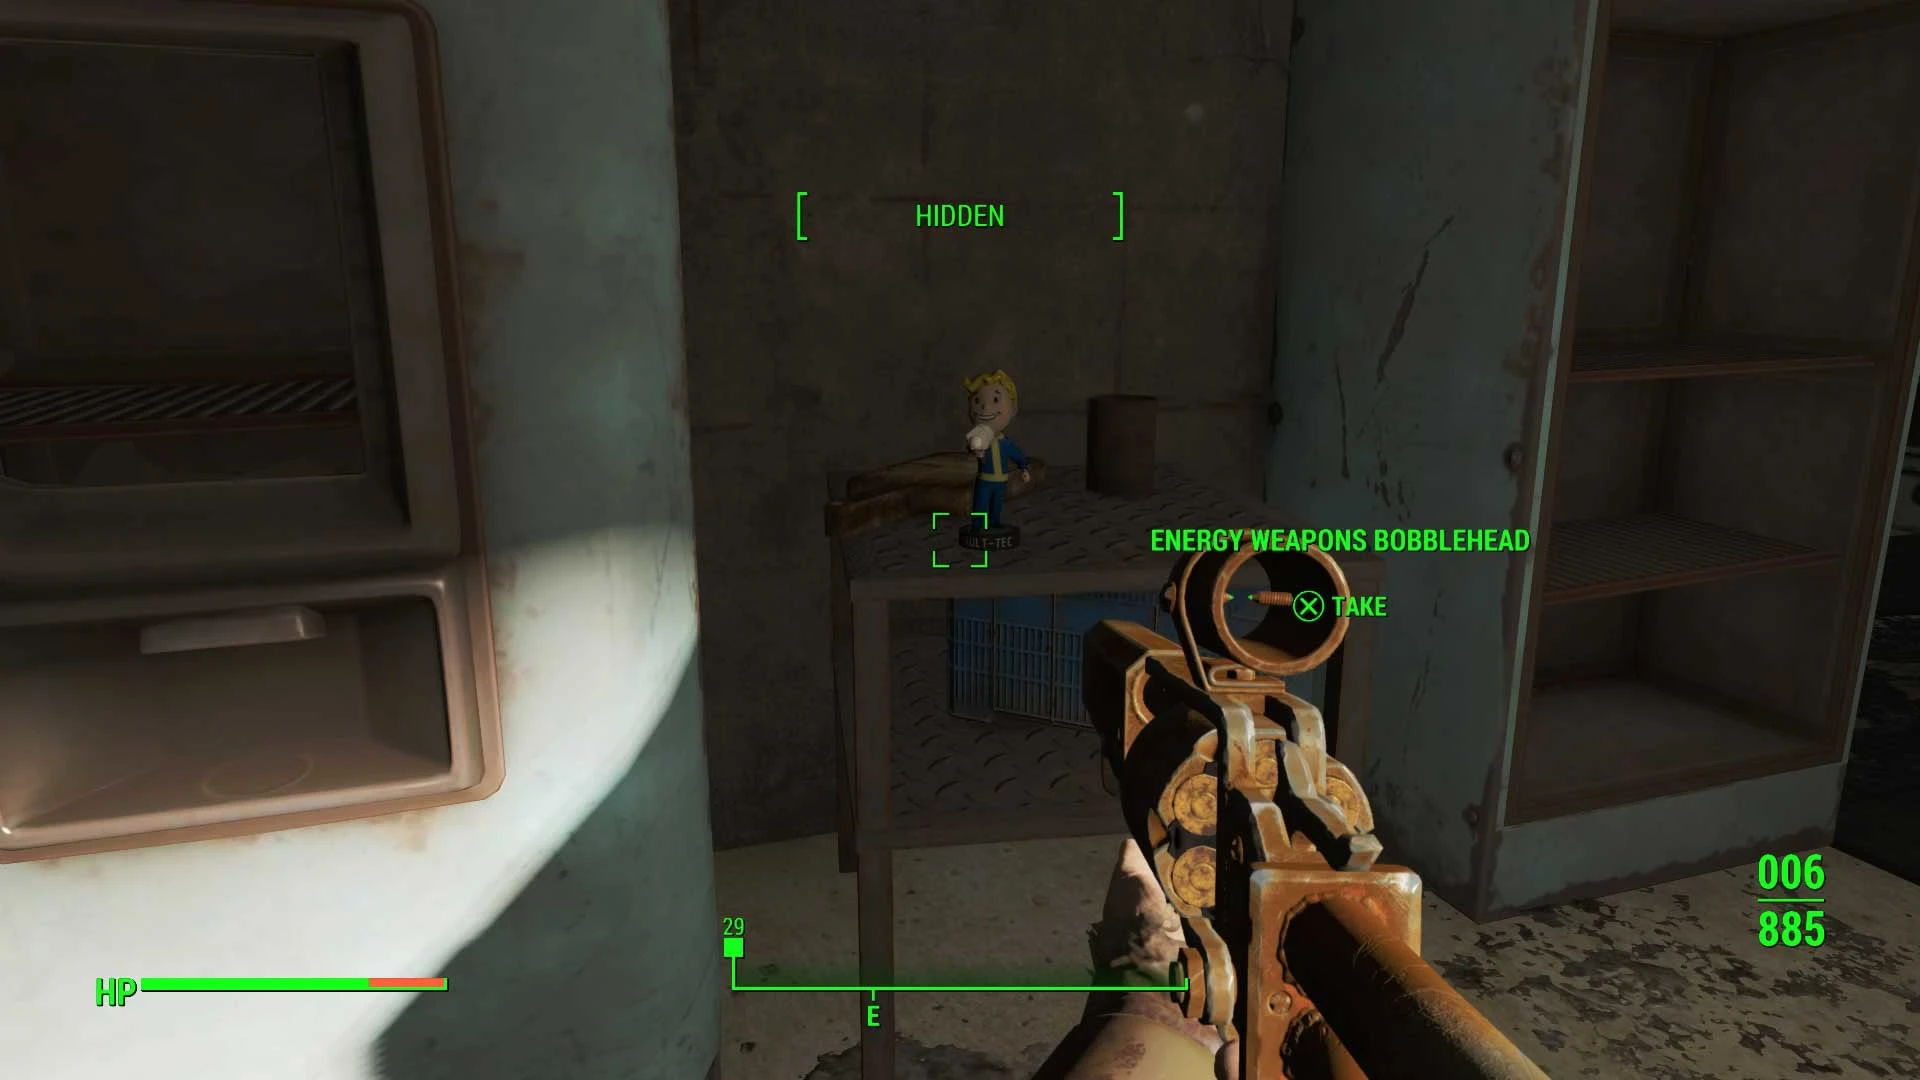
Effect: Permanently gain +25% critical damage with energy weapons
How to get there: Fort Hagen is south of Sanctuary. You'll visit it as part of the main story quest "Reunions," this is where you confront Kellogg. Note: The elevator to the Fort Hagen Command Center is locked until you've started "Reunions," so this bobblehead is effectively quest-gated.
Exact location: Navigate down to the Fort Hagen Command Center (the lowest level). Look for the kitchen in the southwestern section of the center, it's recognizable by two refrigerators and a skeleton hanging out of one of them. The bobblehead is on the small table between the two fridges.
Combat/access warning: Fort Hagen is full of Synths and automated defenses. The Command Center itself is heavily patrolled. Most players grab this naturally during the "Reunions" quest, if that's you, just don't leave without checking the kitchen.
Explosives: Saugus Ironworks
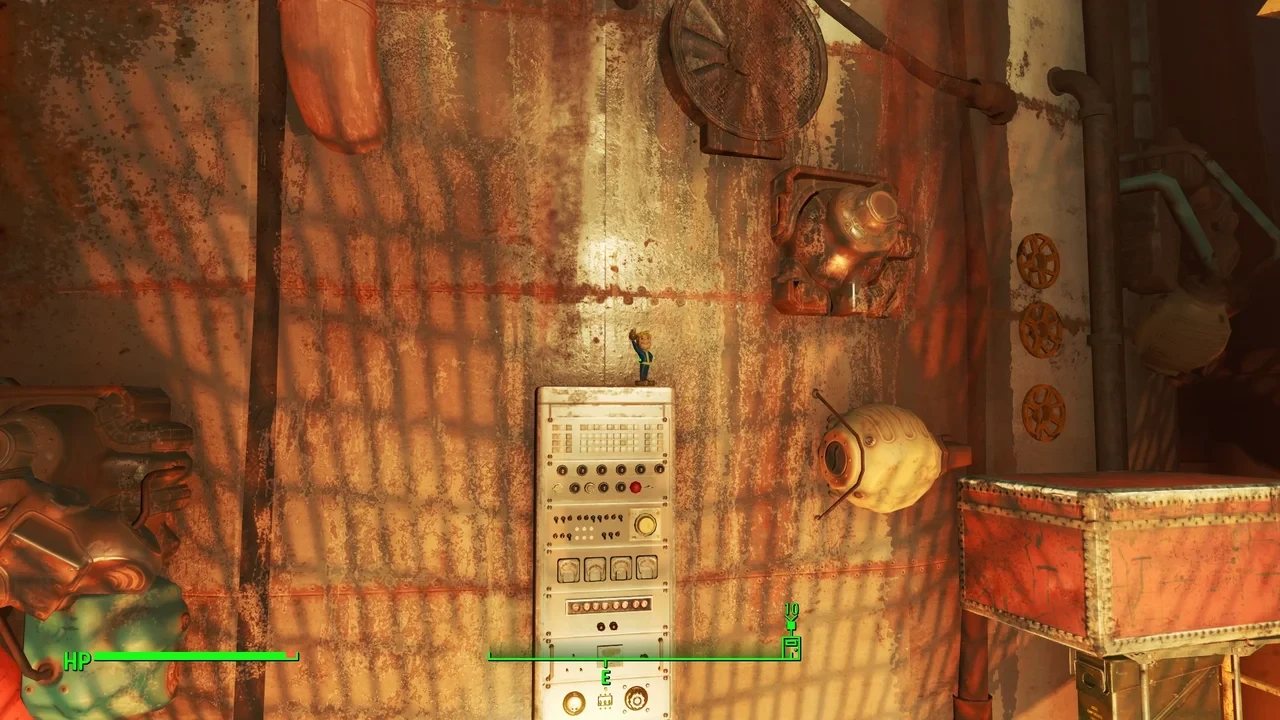
Effect: Permanently gain +15% damage with explosives
How to get there: Saugus Ironworks is in the northeastern part of the map, west of Hub City Auto Wreckers. Enter through the main courtyard.
Exact location: Fight your way to the Blast Furnace room. This is where you'll face the boss Slag and his Forged crew. The bobblehead is on a wall-mounted control panel at the back of the room, up on the second-level catwalk.
Combat/access warning: The Forged enemies here are aggressive and love flamethrowers, fire resistance gear is a genuine help. Slag himself is the toughest fight in the building. Clear him first, then look for the bobblehead on the control panel above.
Lock Picking: Pickman Gallery
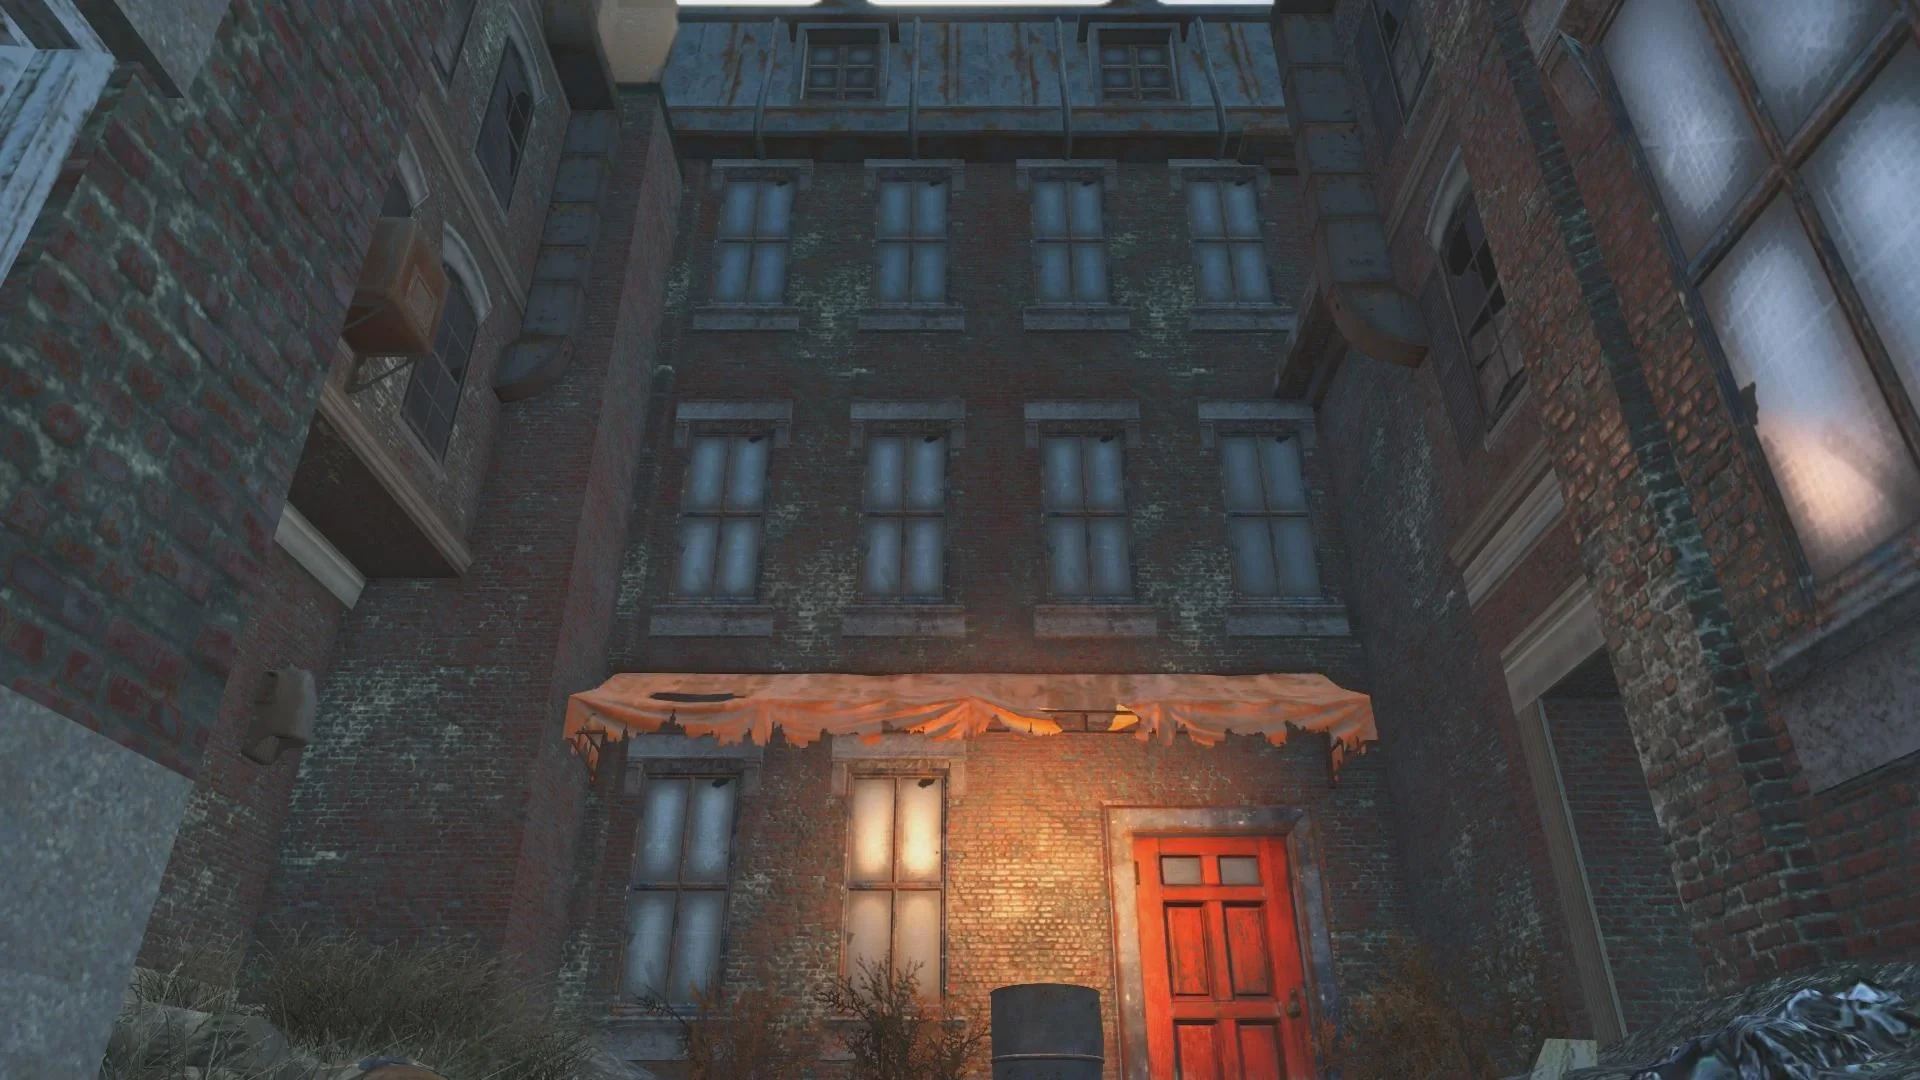
Effect: Lockpicking is permanently easier
How to get there: Pickman Gallery is in Boston's North End, near the Old North Church. It's a raider-occupied building full of gruesome "artwork."
Exact location: Head all the way down to the tunnels in the basement. You'll find Pickman himself in a standoff with a group of raiders. The bobblehead is in that same room, on the ground right next to the flaming trash can.
Combat/access warning: The gallery is full of raiders from top to bottom. The basement encounter with Pickman involves multiple enemies in a tight space. Clear the area before hunting for the bobblehead or you'll miss it in the chaos. Note that how you handle the Pickman encounter can affect the outcome of the unmarked quest here.
Medicine: Vault 81
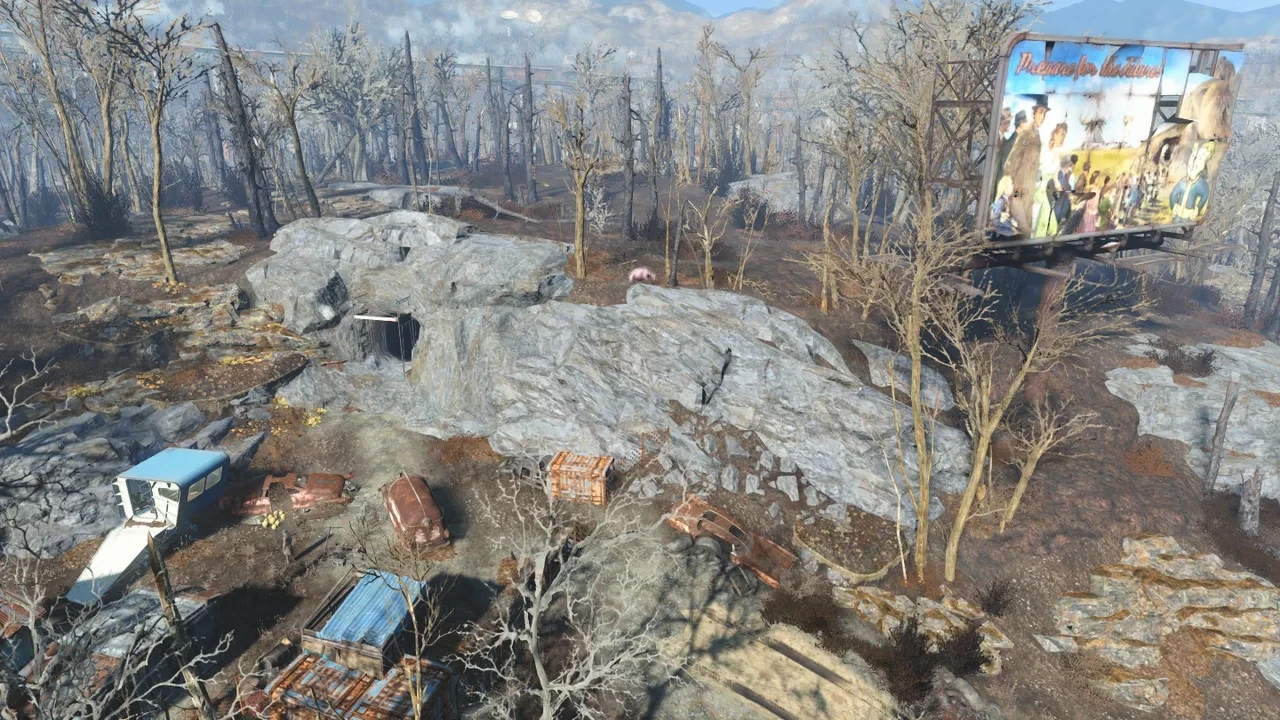
Effect: Stimpaks permanently heal 10% more damage
How to get there: Vault 81 is west of Diamond City. You need to have visited the vault at least once and gained access. Talk to the doctor inside, and you'll be led into the secret portion of the vault via a sequence with a boy named Bobby.
Exact location: The bobblehead is in the office where you find Curie (the robot companion) in the secret section of Vault 81. It's on the desk next to a terminal in her room.
Combat/access warning: The secret section of Vault 81 contains Mole Rats carrying a disease that permanently reduces your max HP by 10 per bite. Avoid getting bitten at all costs. There's only one cure in the entire vault and using it is a moral choice with consequences. The bobblehead is in the final room, so push through carefully.
Melee: Trinity Tower
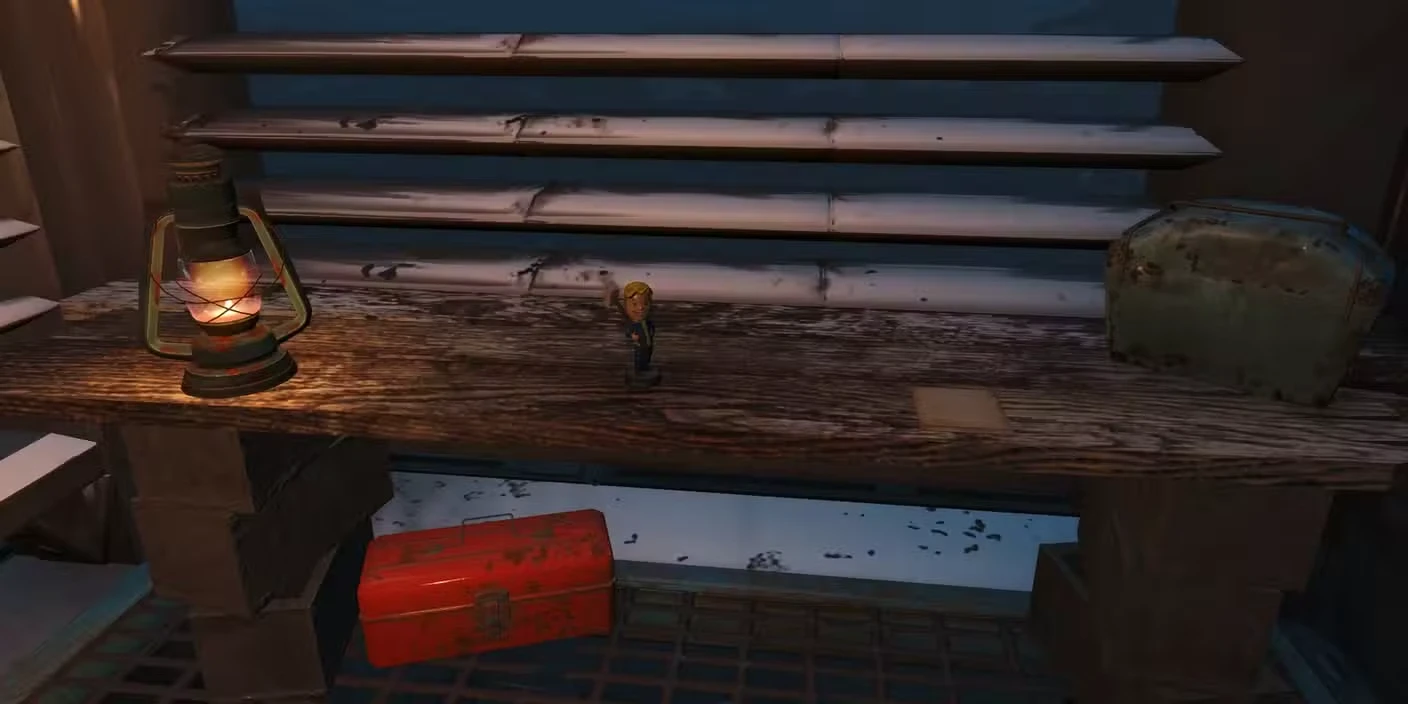
Effect: Permanently gain +25% critical damage with melee weapons
How to get there: Trinity Tower is a skyscraper in downtown Boston, directly east of the Boston Public Library. You'll need to fight your way to the very top.
Exact location: At the top floor, Rex and Strong are locked in a cage. The Trinity Tower Cell Key is in a green steamer trunk just to the left of the cell. Unlock the cage and the bobblehead is on the workbench inside, beside two red toolboxes.
Combat/access warning: Trinity Tower is swarming with Super Mutants and Mutant Hounds from bottom to top. So don’t expect a quick in-and-out job. Use the elevators and stairs to pace yourself as you climb. Rescuing Rex and Strong also triggers a companion recruitment opportunity for Strong if you want him.
Repair: Corvega Assembly Plant
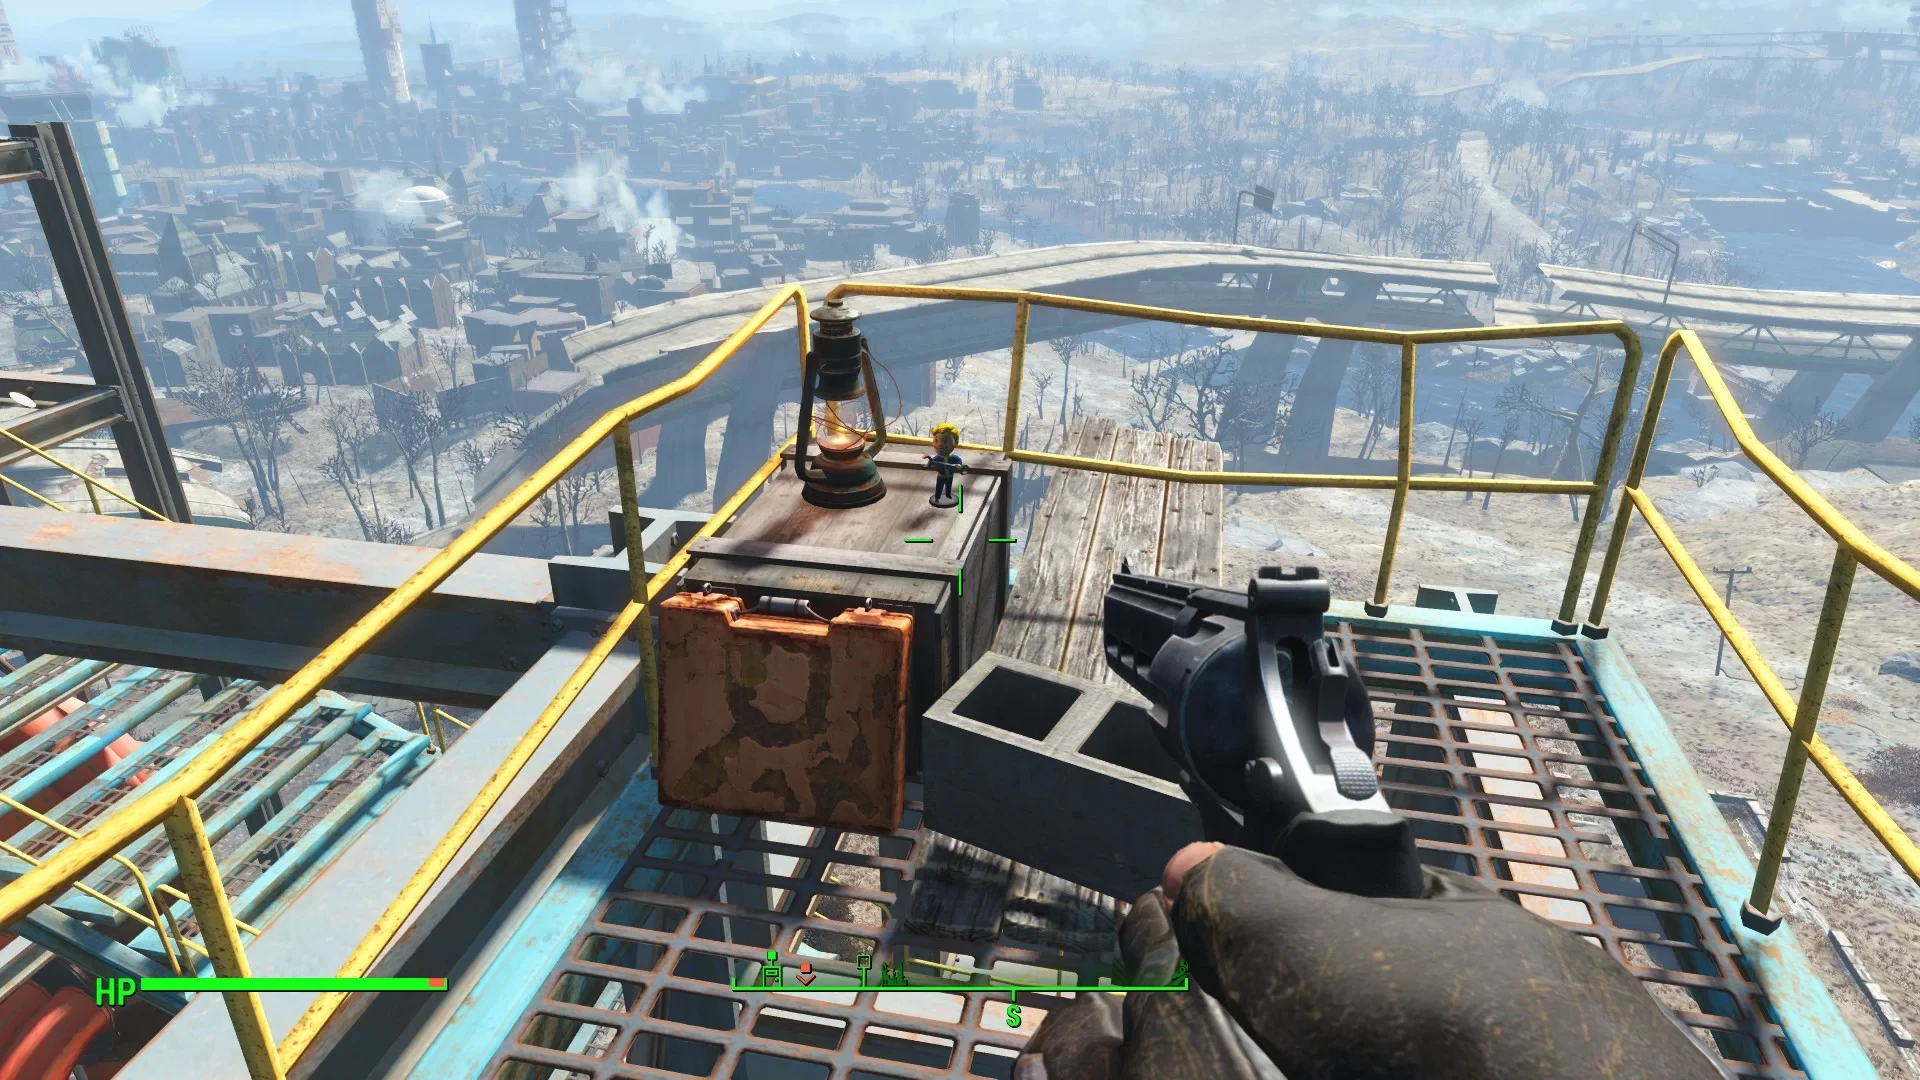
Effect: Fusion cores last 10% longer
How to get there: Corvega Assembly Plant is northwest of Sanctuary, near Lexington. It's an early-to-mid game location tied to a Minutemen radiant quest.
Exact location: This one's on the outside of the building. Take the blue catwalk stairs up to the roof and follow the exterior walkway south. The bobblehead is at the far end of the walkway, right at the edge, the southernmost tip of the plant's rooftop.
Combat/access warning: The plant is full of Raiders inside and out. The rooftop walkway has several of them between you and the bobblehead. Watch your footing near the edge, the walkway is narrow with no barrier at the end.
Science: Malden Middle School (Vault 75)
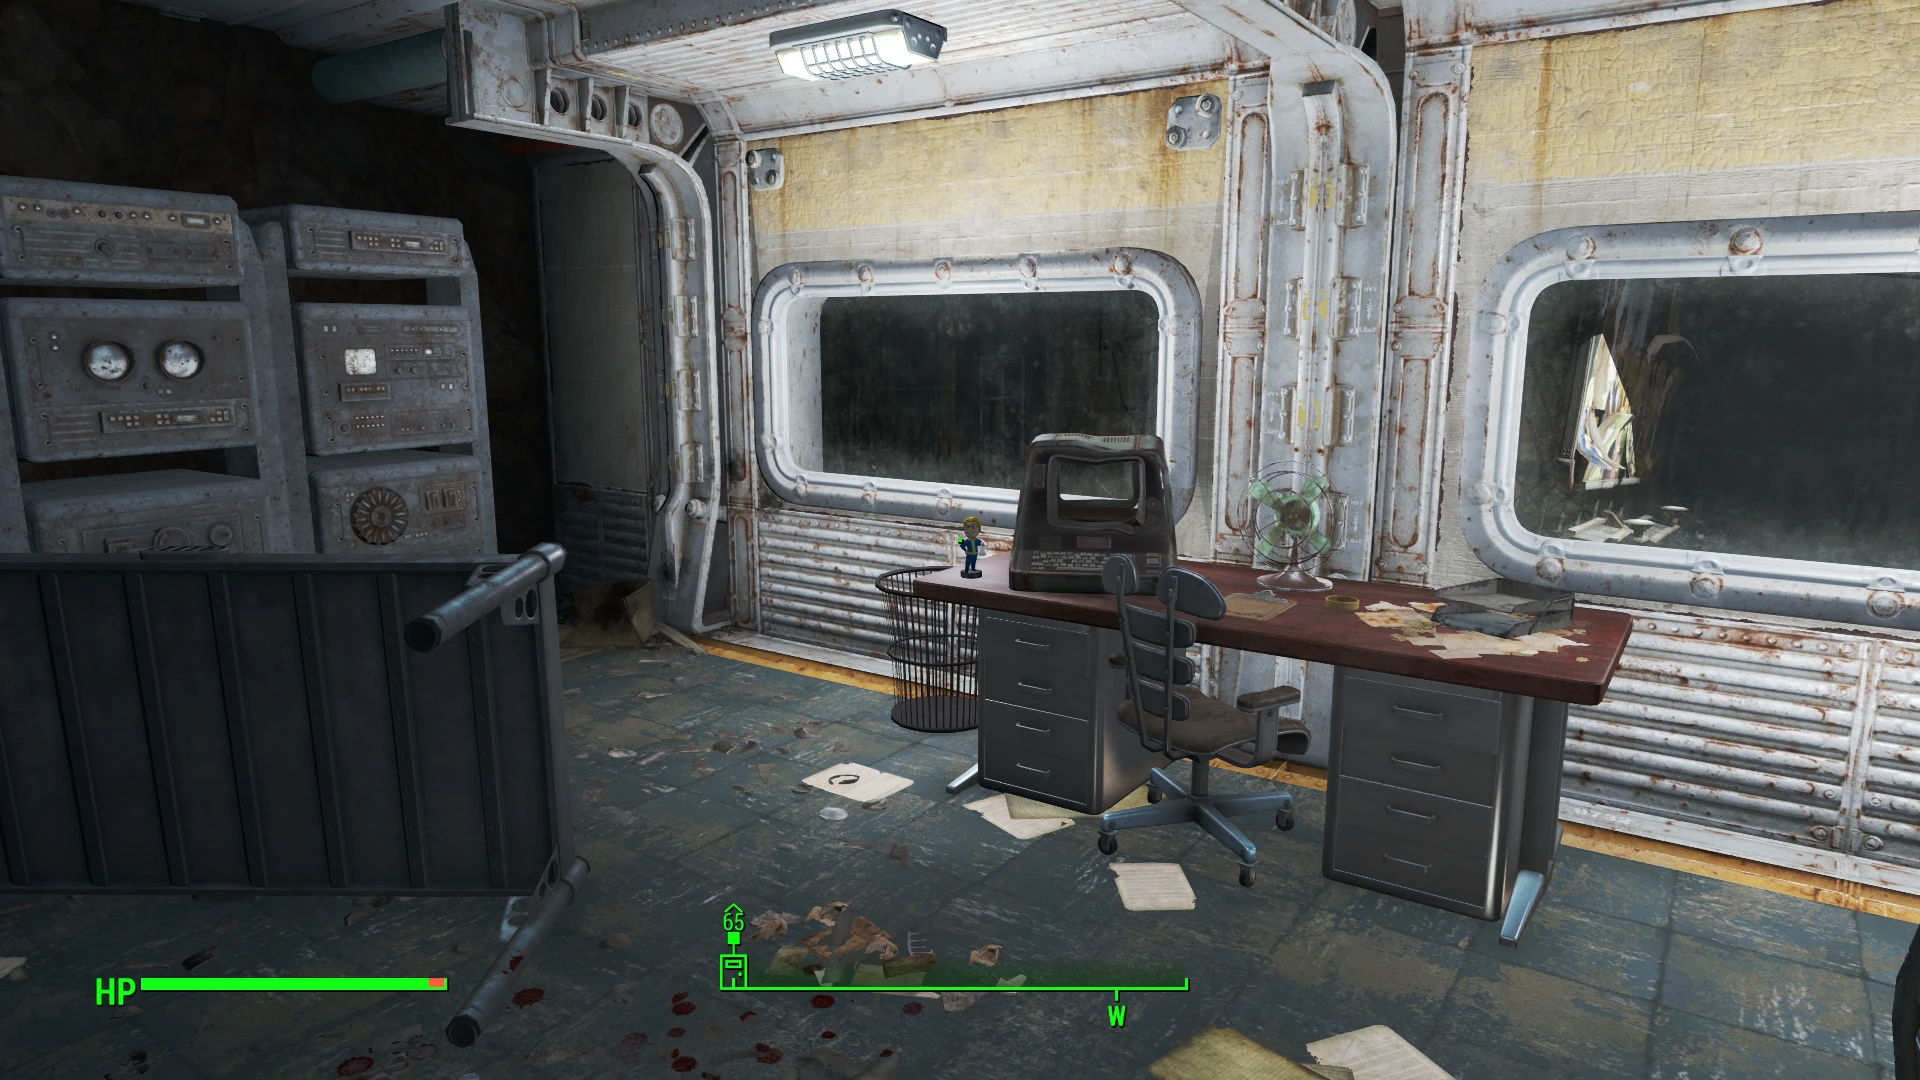
Effect: Get one extra guess when hacking terminals
How to get there: Malden Middle School is in the north-central part of the map. It doubles as the entrance to Vault 75, one of Vault-Tec's more disturbing experiments. Head inside the school and find the Vault 75 entrance in the basement.
Exact location: Navigate to the third level of the basement, where there's a diner facility. The bobblehead is on a table in the diner area.
Combat/access warning: Vault 75 is packed with Gunners across multiple floors. To reach the bobblehead you'll need the Vault 75 Lab Access Card, carried by the Gunner Commander in the simulation area (or found in the tool case next to him). The bobblehead is in the same room as the Gunner holding the Admin Access Card, on the desk overlooking the diner. Also worth knowing: a known bug can prevent the key cards from spawning if a miscellaneous "Search for Caps" quest is active pointing to the vault. PC players can use console commands to work around it, but console players should be aware of this before committing to a full clear.
Small Guns: Gunners Plaza
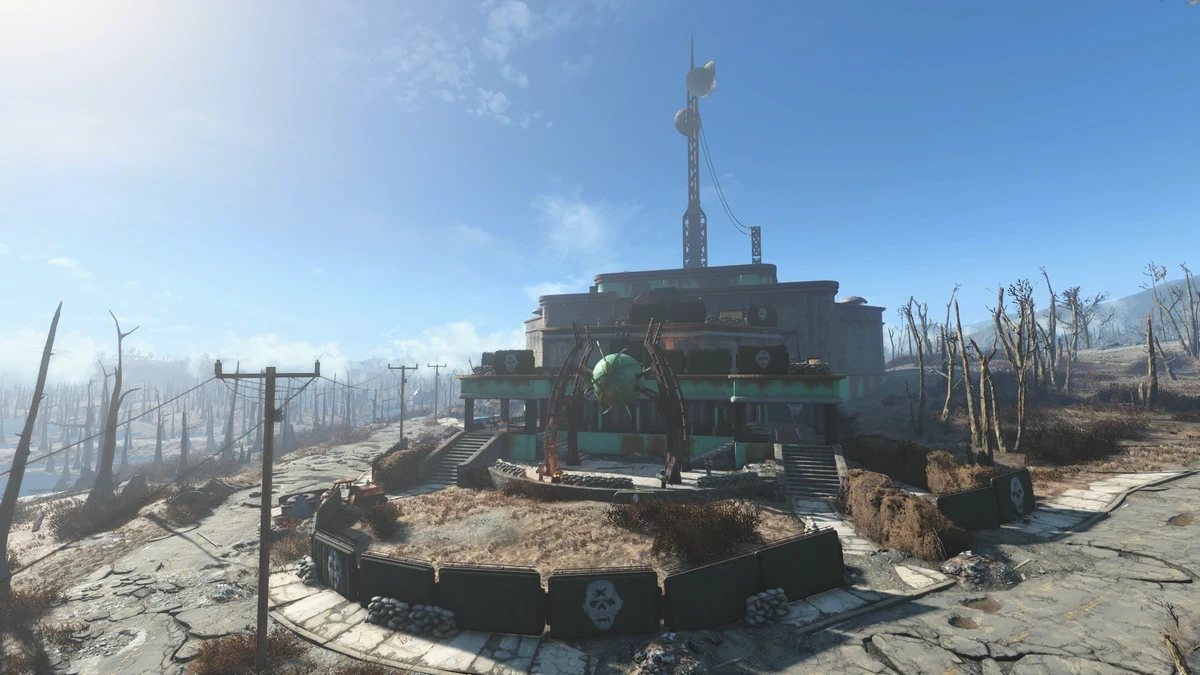
Effect: Permanently gain +25% critical damage with ballistic guns
How to get there: Gunners Plaza is a radio broadcast building in the southeastern part of the map, northeast of Vault 95. It's entirely controlled by Gunners with turrets and Assaultrons throughout.
Exact location: The bobblehead is in the On-Air recording studio on the ground floor, on the west side of the building. It's on Captain Wes' desk inside the room. The studio's orange double doors are Master-locked. If you can't pick them, take the elevator down one floor to find the GNN Recording Room Key on a Gunner named Ryder.
Combat/access warning: Gunners Plaza is a tough location with heavy enemy density and automated turrets. Captain Wes inside the studio is a formidable fight in a confined space. Clear the room before grabbing the bobblehead, it's easy to knock off the desk in a firefight.
Sneak: Dunwich Borers
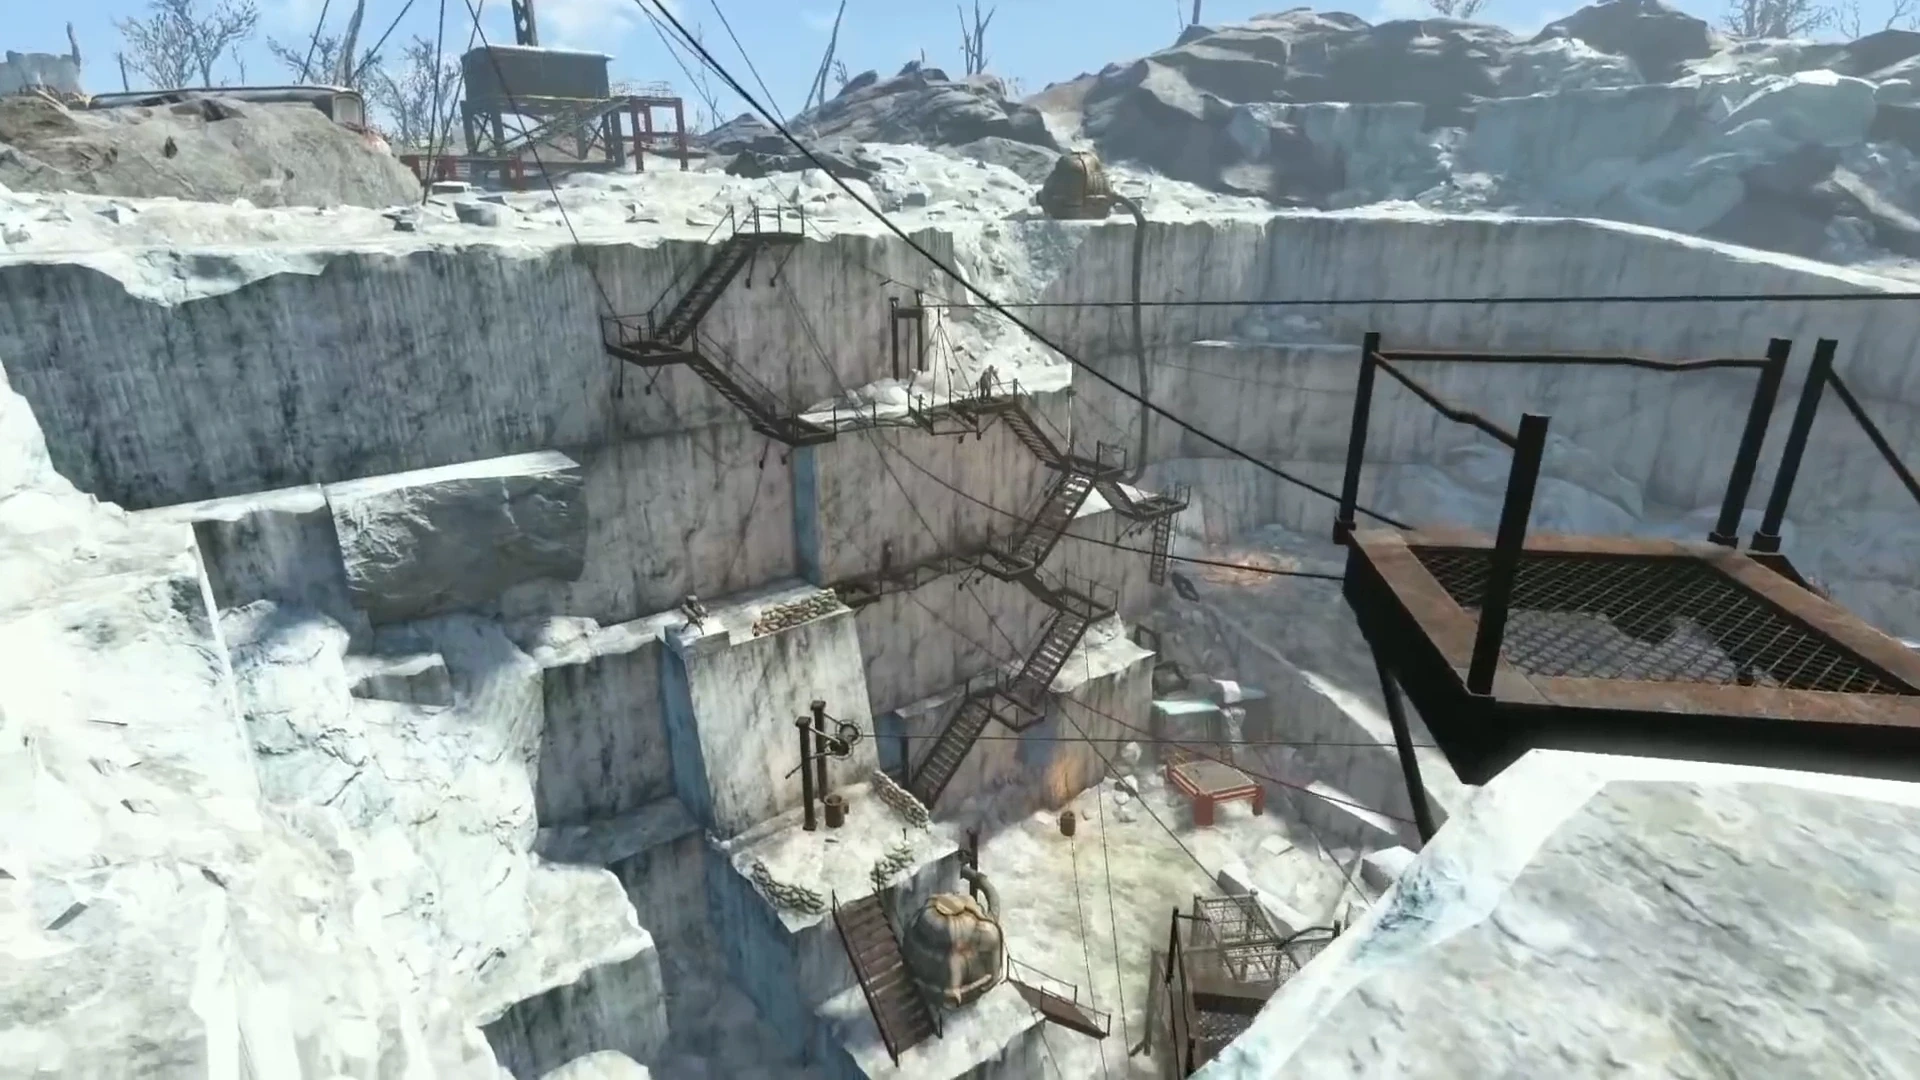
Effect: You are permanently 10% harder to detect
How to get there: Dunwich Borers is a quarry in the northeastern corner of the map. It's a multi-level site with a trail of numbered terminal posts leading deeper into the facility.
Exact location: Follow the terminal trail to the post marked "Area 4." The bobblehead is on a small metal table next to a lantern, right beside that directional sign.
Combat/access warning: Dunwich Borers is one of the creepiest and most dangerous locations in Fallout 4. It's full of Ghouls (including Feral Ghouls that appear in waves) and the deeper levels contain some genuinely disturbing lore. Bring a weapon with good crowd-control capability and don't rush the terminal trail or you'll overshoot the Area 4 marker.
Dunwich Borers is the kind of location that rewards players who can hear what's coming. Feral Ghouls don't announce themselves. Directional audio is the difference between getting the drop on them and getting swarmed. The Arctis Nova 7 Wireless delivers spatial sound across both 2.4GHz and Bluetooth, so you'll hear every shuffling footstep before it reaches you— in Dunwich and everywhere else in the Commonwealth.
Speech: Park Street Station (Vault 114)
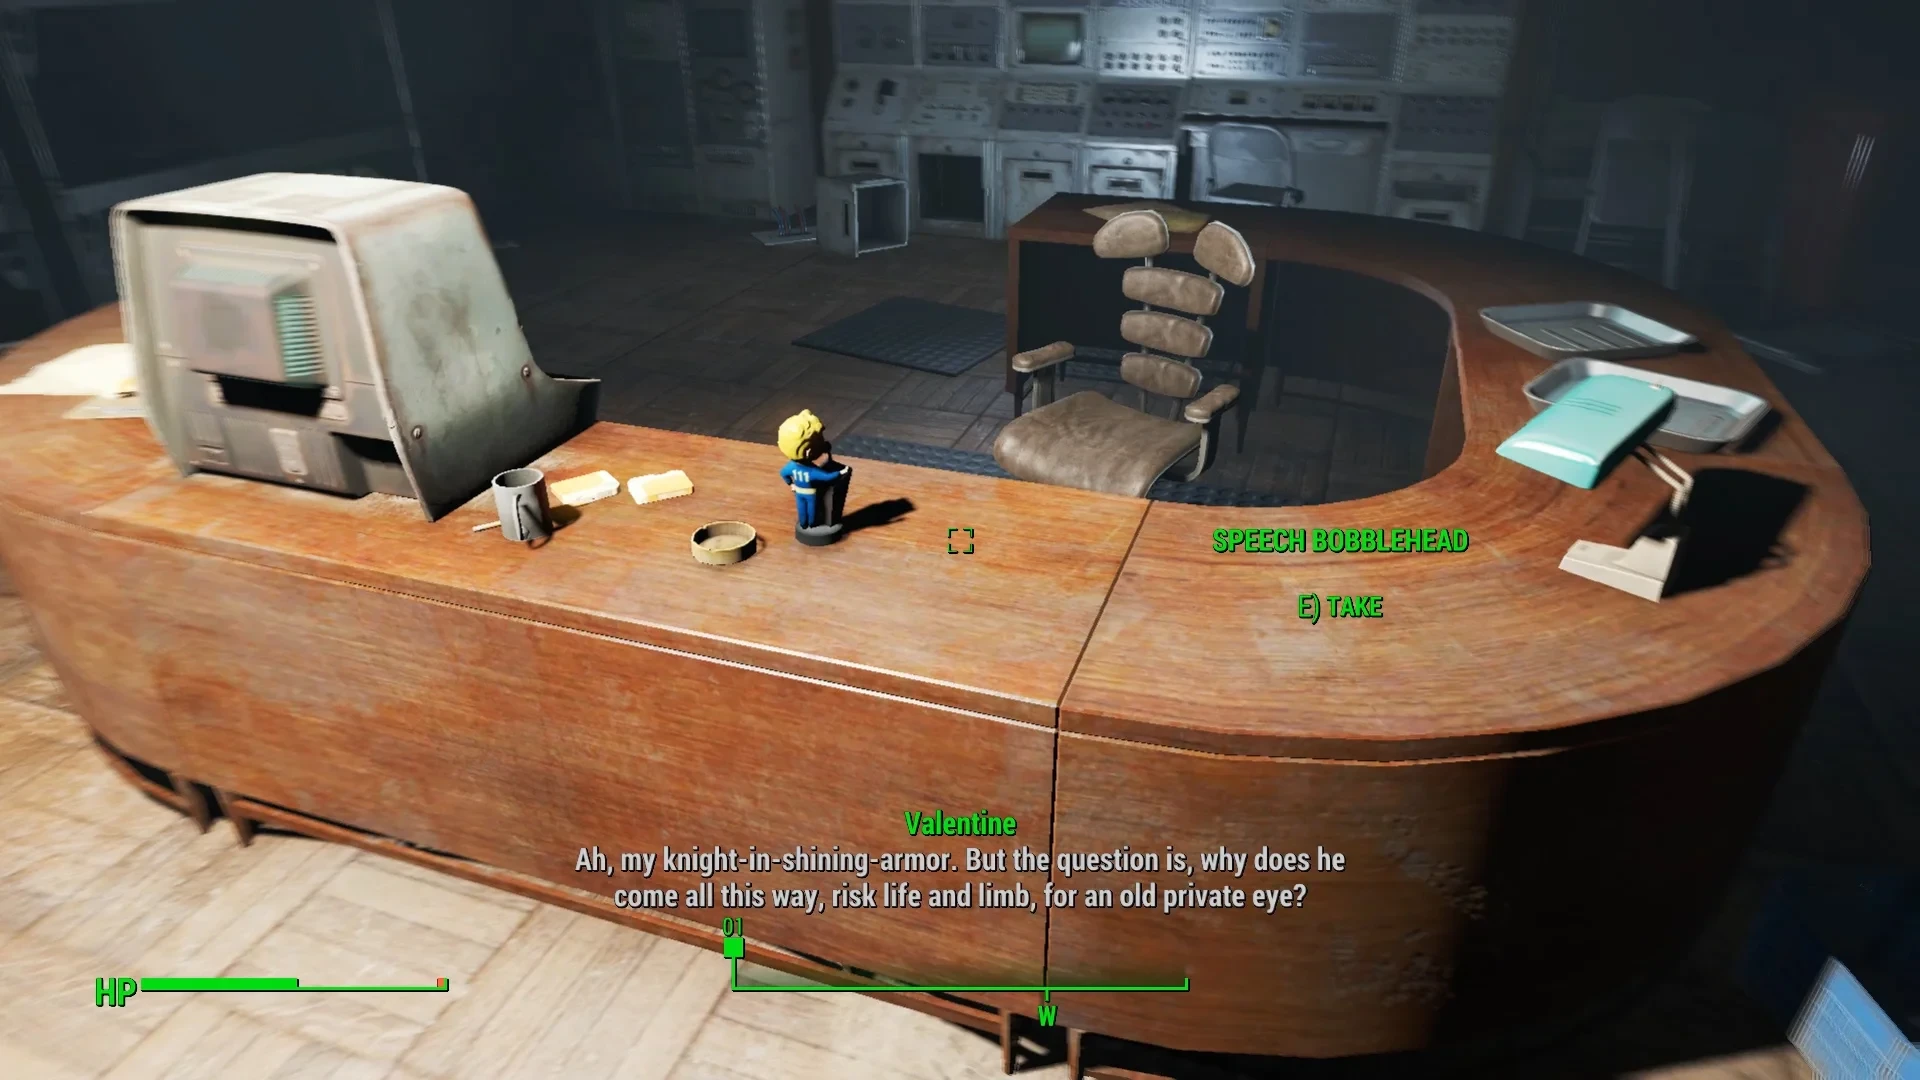
Effect: All vendors permanently have 100 more caps for bartering
How to get there: Park Street Station is in Boston, accessible via a subway entrance. It leads to Vault 114, which you'll visit during the main quest "Unlikely Valentine" to rescue Nick Valentine. This bobblehead is effectively quest-gated. You need to be on or have completed that mission to access it.
Exact location: Make your way through Vault 114 to the Overseer's office. The bobblehead is on the desk inside.
Combat/access warning: Vault 114 is controlled by Triggermen (gangsters). The layout funnels you through several rooms of them before reaching the Overseer's office. Most players grab this naturally while rescuing Nick, if that's you, don't leave the vault without checking the Overseer's desk.
Unarmed: Atom Cats Garage
Effect: Permanently gain +25% critical damage with unarmed attacks
How to get there: Atom Cats Garage is in the southeastern part of the map, south of Quincy. It's a friendly settlement run by a Power Armor gang called the Atom Cats. No combat required to get in.
Exact location: Head into the main garage area. Look for a rusted car on the floor. The bobblehead is sitting on the hood.
Combat/access warning: This is one of the most straightforward bobbleheads in the game, no enemies to fight, no quest required. Just walk in, grab it off the car, and leave. Worth noting that the Atom Cats become hostile if you destroy the Quincy settlement during the "Minutemen vs. Gunners" questline, so grab this one before that if it applies to your playthrough.
Are Bobbleheads Worth Collecting?
Short answer: yes, every single one.
Each bobblehead delivers a permanent passive boost that stacks with everything else: perks, gear, consumables, and level-up points. They don’t wear off, they don’t take up perk slots, and they can’t be lost or sold once collected. For a game built around long playthroughs and build optimization, that’s hard to pass up.
A few things worth knowing before you go hunting:
Grab SPECIAL bobbleheads at 10 if you can. SPECIAL bobbleheads collected while a stat is already maxed at 10 will push it to 11, breaking the normal cap. If you pick one up at, say, 6, your stat goes to 7 and the cap stays at 10. It's not a reason to skip them early if you need the stat boost now, but if you're min-maxing a specific build, patience pays off here.
Skill bobbleheads are always worth it regardless of timing. The 13 skill bobbleheads grant flat bonuses: +25% critical damage, better Stimpak healing, 100 extra vendor caps. Grab these whenever you're in the area.
Some are missable by faction choice. A handful of bobbleheads are tied to locations that become hostile or inaccessible depending on your endgame faction decisions, notably Vault 75, which sees enemy composition change based on who you sided with. None are permanently locked out mid-game, but it's worth sweeping locations before committing to a final faction.
They display on a stand. Collect all 20 and you can show them off on a bobblehead stand crafted at any settlement workshop, it holds all 20 and serves as a satisfying visual tracker of your progress.
The Commonwealth Awaits
Twenty bobbleheads, twenty permanent upgrades.
Whether you’re sweeping the map in your first playthrough or you’re on a completionist run, the payoff is worth every fight, locked door, and quest prerequisite standing between you and a full collection. Stack them early where you can, save the S.P.E.C.I.A.L ones for when your stats are maxed, and don’t leave Fort Hagen or Vault 114 without checking the rooms most players walk past.
Fallout 4 Bobblehead Locations: FAQ
How many bobbleheads are in Fallout 4?
There are 20 bobbleheads in Fallout 4. Seven are SPECIAL bobbleheads that each raise a core attribute (Strength, Perception, Endurance, Charisma, Intelligence, Agility, Luck) by +1. The remaining 13 are skill bobbleheads that grant permanent passive bonuses like increased critical damage, better Stimpak healing, and cheaper vendor prices.
What does collecting all 20 bobbleheads do?
Beyond the individual stat and skill bonuses each one provides, collecting all 20 unlocks the ability to display the complete set on a bobblehead stand at any settlement. There's no single achievement bonus for the full set, but the permanent stat gains across all 20 represent a significant cumulative boost to your character.
What's the hardest bobblehead to find in Fallout 4?
The Charisma bobblehead at Parsons State Insane Asylum is widely considered the hardest to obtain, not because of combat difficulty, but because it requires completing a specific chain of quests (Special Delivery → Emogene Takes a Lover → The Secret of Cabot House) before the location is even accessible. A known console bug can also lock players out permanently.
Can you miss bobbleheads in Fallout 4?
Technically no, none are on a permanent missable timer. However, a few are locked behind quest progression (Fort Hagen, Vault 114, Parsons State Insane Asylum), and the Charisma bobblehead can become unobtainable on console due to a quest bug. It's safest to grab quest-gated bobbleheads during the missions that take you there naturally.
Do bobbleheads stack with other stat bonuses?
Yes. Bobblehead bonuses stack with perks, gear, consumables, and level-up points. SPECIAL bobbleheads add permanently to your base stat, which counts toward perk unlock requirements. The one exception: if you collect a SPECIAL bobblehead before a stat hits 10, it won't allow you to exceed the cap later via level-up points alone.
What's the rarest bobblehead in Fallout 4?
No bobblehead is technically rare since all 20 are fixed spawns, but the Luck bobblehead on Spectacle Island is arguably the most overlooked. It's on an island in the far southeastern bay with no quest pulling you there, surrounded by Mirelurks, including a Queen. Many players finish the game without ever visiting the island.
Joey Carr is a seasoned esports and gaming journalist with over 7 years of experience. He has covered major events like DreamHack Atlanta, Call of Duty Championships 2017, and Super Bowl 53.